SENTENCE U | Day 15 (포스트 CRUD/댓글기능/유저페이지)
글 CRUD 기능 완성 (수정/삭제)
일단 수정/삭제 기능을 추가하기 위해서 post카드를 클릭했을 때 수정버튼과 삭제버튼이 나오도록 구현했다.
post카드를 눌렀을때 높이를 조절하는 것은 ref와 css를 사용해서 적용했다.
처음에는 state를 사용해서 emotion props로 보냈는데, state가 바뀔때마다 post카드가 리렌더링 되는 바람에 useRef를 사용했다.
postContainer 자체에 ref를 적용하고 그 안에있는 PostWrap에 onClick이벤트를 줬다.
<Container ref={containerRef}>
  <PostWrap onClick={onClickHandler}>
PostWrap이 클릭되면 Container에 클래스'open'을 추가/삭제하는 기능이다.
이 때 like버튼을 클릭할 경우에는 열리지 않도록 클릭한 것이 svg나 path인 경우에는 동작하지 않도록 했다.
추가로 유저가 수정중인 상황에도 닫히면 안되기 때문에 isEditing state도 조건에 넣었다.
const onClickHandler = useCallback(
  (e) => {
    if (e.target.tagName !== 'svg' && e.target.tagName !== 'path' && !isEditing) {
      if (containerRef.current.classList.contains('open')) {
        containerRef.current.classList.remove('open');
        commentRef.current.classList.remove('open');
      } else {
        containerRef.current.classList.add('open');
        commentRef.current.classList.add('open');
      }
    }
  },
  [isEditing],
);
Emotioni(CSS)는 간단하다. Container에 클래스 open이 붙은경우에 높이값을 조절하는데 transition으로 부드럽게 변화를 준다.
&.open {
  height: 380px;
  transition: all 0.3s;
}
글의 수정/삭제는 본인 글만 가능하도록 해당 post유저명과 접속중인 유저명을 비교해서 버튼의 유무를 설정했다.
{postUser === userName ? (
  <PostAction>
    <span onClick={onEditHandler}>{isEditing ? '취소' : '수정'}</span>
    <span onClick={onDeleteHandler}>삭제</span>
  </PostAction>
) : (
  ''
)}
삭제 버튼은 눌렀을 때 바로 삭제되지 않고 유저에게 삭제할 것인지 confirm창으로 한번 물어보게 된다.
확인, 즉 true를 받았을 경우 이후 서버의 삭제 api로 요청을 보내고 성공하면 카드를 닫는 open클래스를 삭제시키고, 카드를 안보이게만들 removed클래스를 추가한다. 이렇게하면 전체게시물을 다시 불러올 필요 없이 UI상에서 카드가 삭제되는 것처럼 보인다.
const onDeleteHandler = useCallback(() => {
  if (window.confirm('삭제하시겠습니까?')) {
    axios
      .delete(`/api/posts/${postId}`, { withCredentials: true })
      .then((res) => {
        toast.success('삭제 성공');
        containerRef.current.classList.add('removed');
        containerRef.current.classList.remove('open');
        commentRef.current.classList.remove('open');
        setIsEditing(false);
      })
      .catch((error) => {
        console.log(error);
        toast.error('오류가 발생했습니다.');
      });
  }
}, [postId]);
수정 버튼을 눌렀을 경우에는 isEditing state를 바꿔서 수정모드로 바뀌게 되고 원래 글 내용이였던 div태그가 form태그로 바뀌게 되면서 input창으로 변경된다.
const onEditHandler = useCallback(() => {
  setIsEditing((prev) => !prev);
}, []);{isEditing ? (
<EditForm onSubmit={onEditSubmit}>
<EditLabel htmlFor='editTitle-label'>
<EditInput
autoFocus
autoComplete='off'
type='text'
name='editTitle'
id='editTitle-label'
value={editTitle}
onChange={onChangeEditTitle}
/>
</EditLabel>
<EditButton id='Button' type='submit' />
</EditForm>
) : (
<Title>{editTitle ? editTitle : postTitle}</Title>
)}input의 value와 onChange는 새로운 state와 함수를 만들어 다른 input들 처럼 설정하면 된다.
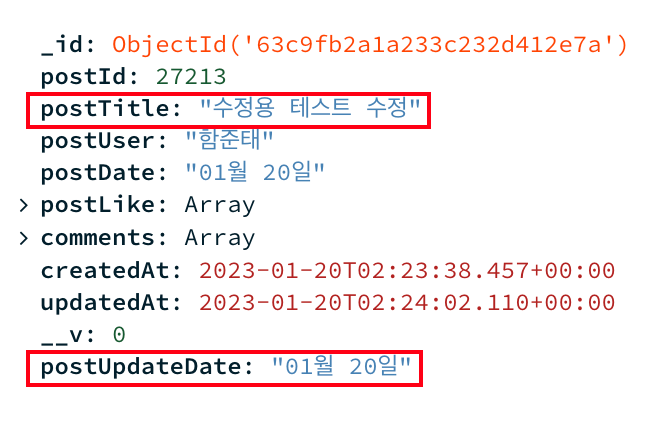
수정하고 서버로 submit했을 때 DB에는 새로운 post내용으로 update되는 것을 확인할 수 있었다.
router.put('/posts/:id', async (req, res) => {
  console.log(req.body);
  await Post.updateOne(
    { postId: req.body.postId },
    { $set: { postTitle: req.body.postTitle, postUpdateDate: now.format('MM월 DD일') } },
  )
    .then((post) => {
      if (!post) return res.status(404).json({ message: 'Post not found' });
      return res.status(200).json({ updatePost: true });
    })
    .catch((error) => {
      console.log(error);
      return res.status(403).json(error);
    });
});
하지만 문제는 수정에 성공했을 경우에 전체 포스트를 다시 불러오지 않고 바로 수정된 내용을 보여주고 싶었다.
그래서 처음에 post들을 불러왔을 때 title내용은 postTitle변수를 불러오지만 수정했을 경우에는 editTitlestate가 생긴다.
<Title>{editTitle ? editTitle : postTitle}</Title> 이렇게 코드를 짜게 되면 post에 수정된 내용이 즉시 반영되는 것을 볼수 있다.
글 댓글 기능 추가
댓글은 post를 클릭해서 height높이가 커졌을 때만 보이도록 했다.
댓글 기능은 like버튼을 눌렀을 때와 동작하는 구조가 비슷하다.
댓글을 작성하고 submit했을 때 해당 post의 comments라는 배열 안에 댓글을 하나씩 push해주면 된다.
router.post('/posts/:id/comments', async (req, res) => {
  await Post.findOne({ postId: req.body.postId }).then((post) => {
    if (!post) return res.status(404).json({ message: 'Post not found' });
    post.comments.push({
      comment: req.body.comment,
      commentUser: req.body.userName,
      commentDate: now.format('MM월 DD일'),
      createdAt: Date.now(),
    });
    post
      .save()
      .then(() => res.json({ commentSuccess: true }))
      .catch((error) => res.status(500).json({ message: error.message }));
  });
});
댓글이 많아질 수록 보여지는데에는 한계가 있으니 댓글창도 react-scrollbar로 감싸서 스크롤이 가능하도록 했다.
<Scrollbars className='scroll-bar' autoHide autoHideTimeout={500} autoHideDuration={200}>
{commentList.length === 0 ? (
<div style={{ textAlign: 'center', paddingTop: '60px' }}>작성된 댓글이 없습니다.</div>
) : (
commentList.map((comment, i) => (
<Comment key={i}>
<span>{comment.commentUser}</span>
<span>{comment.comment}</span>
<span>{comment.commentDate}</span>
</Comment>
))
)}
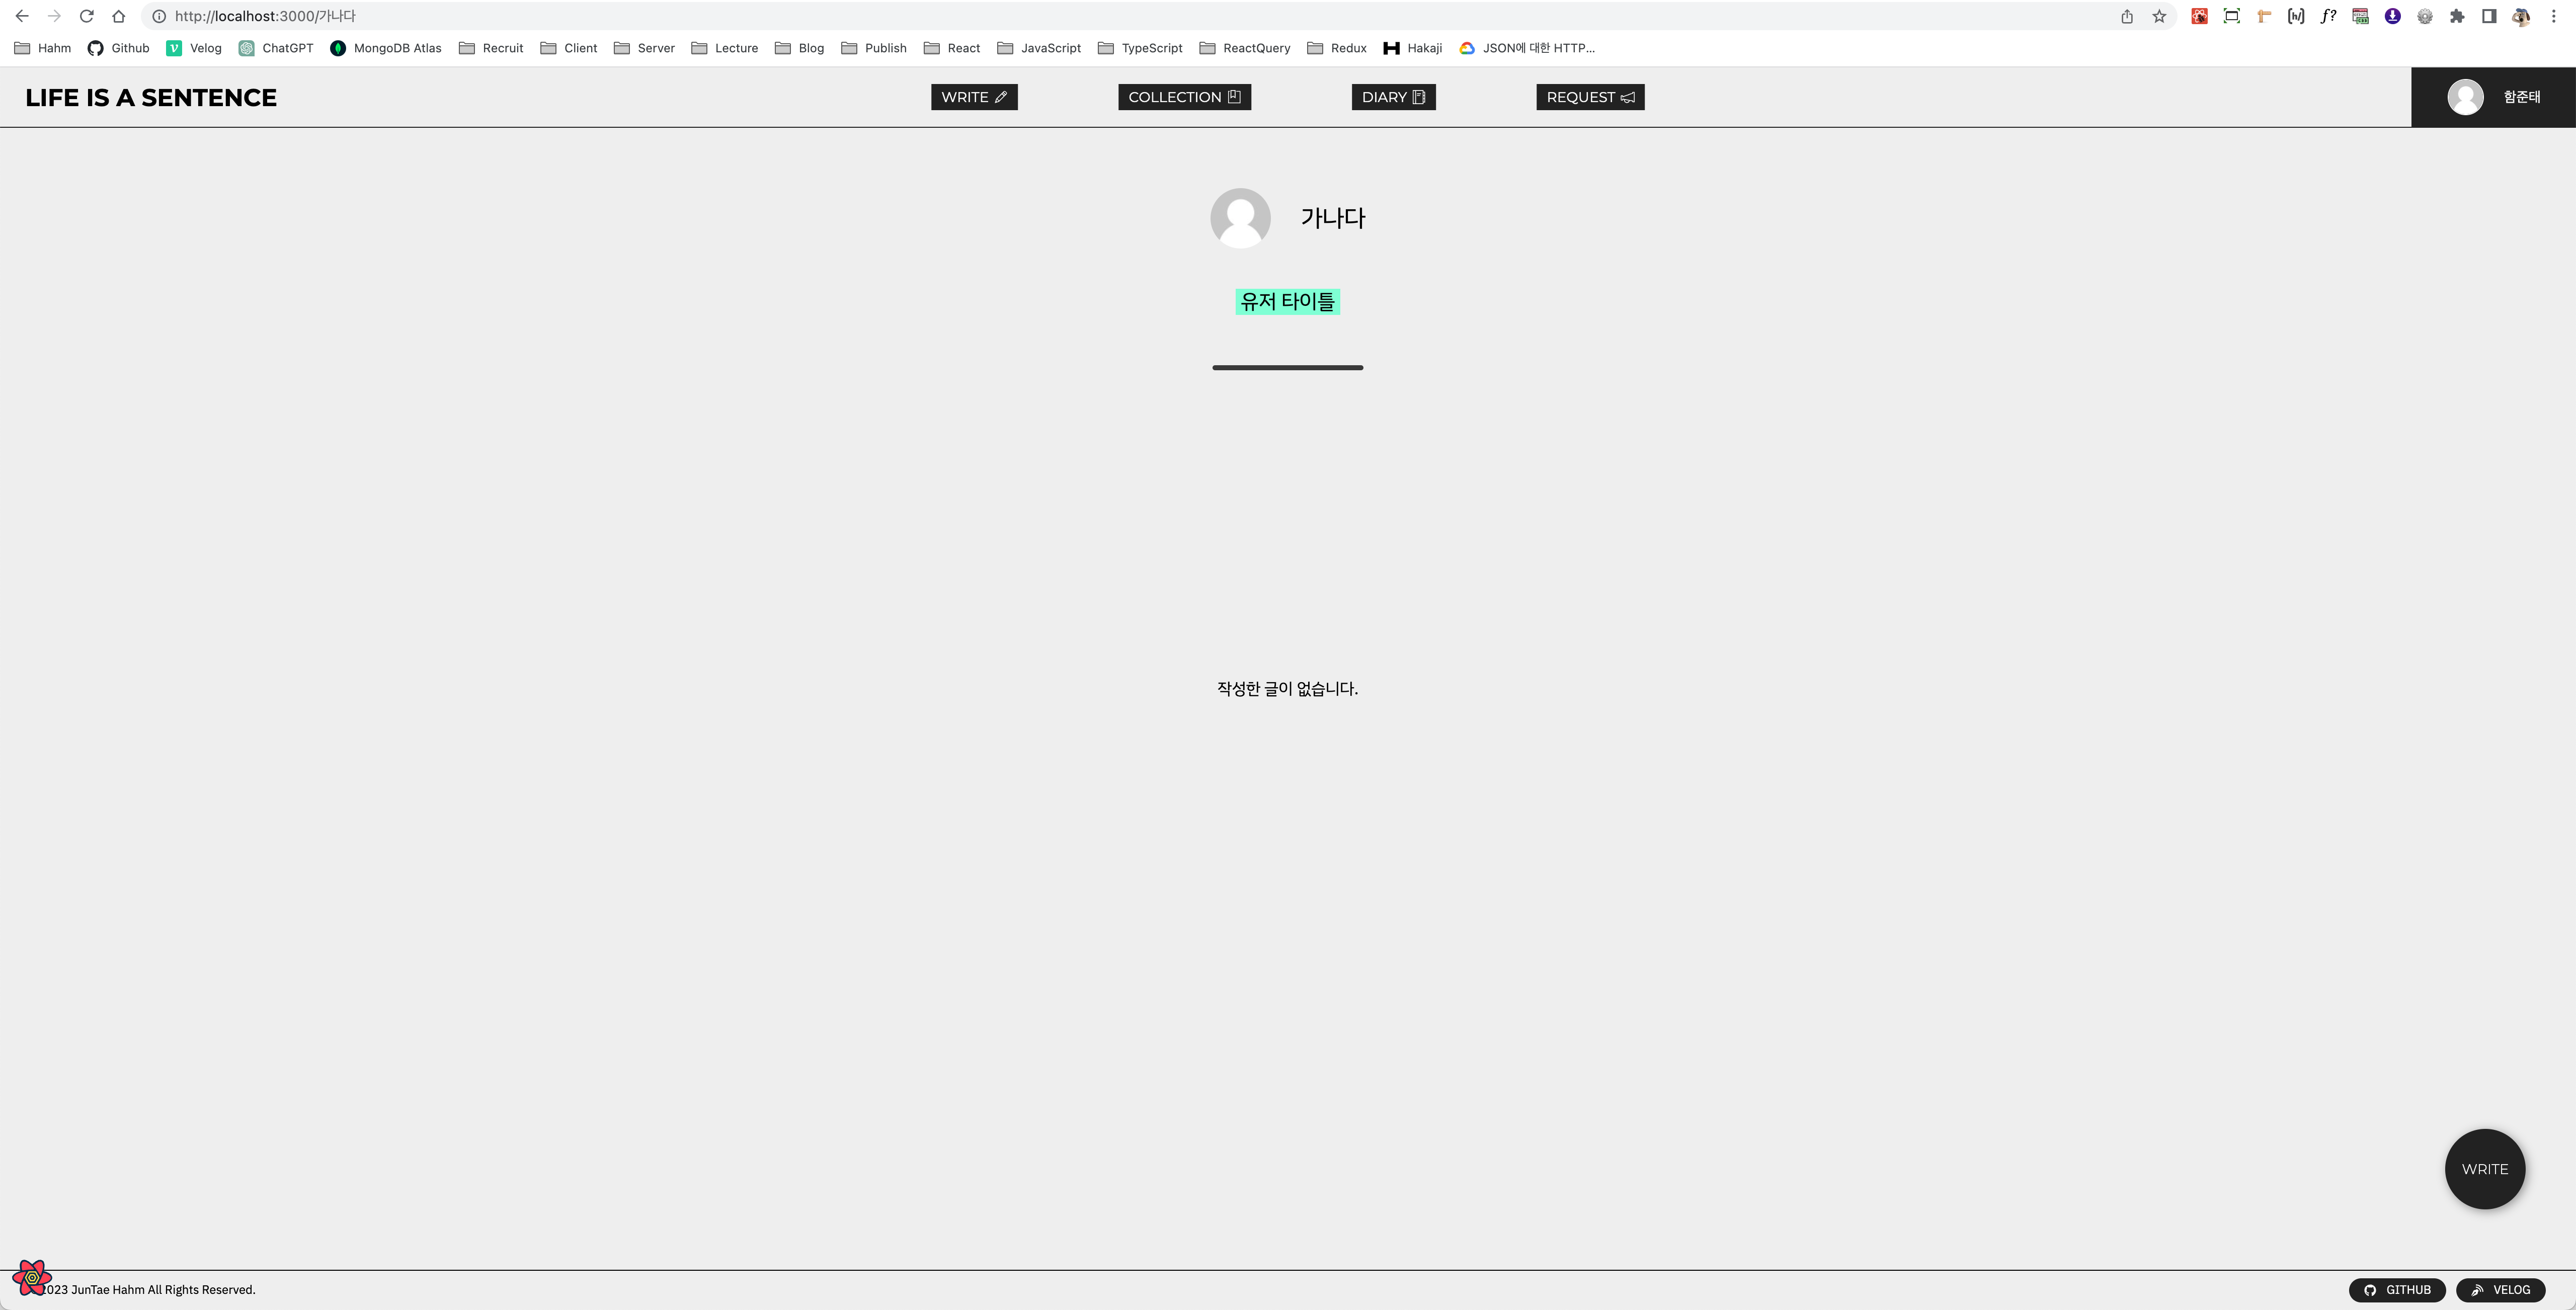
</Scrollbars>유저페이지 레이아웃
유저의 페이지는 params의 user명을 받아와 해당 유저가 작성한 글만 보이도록 했다.
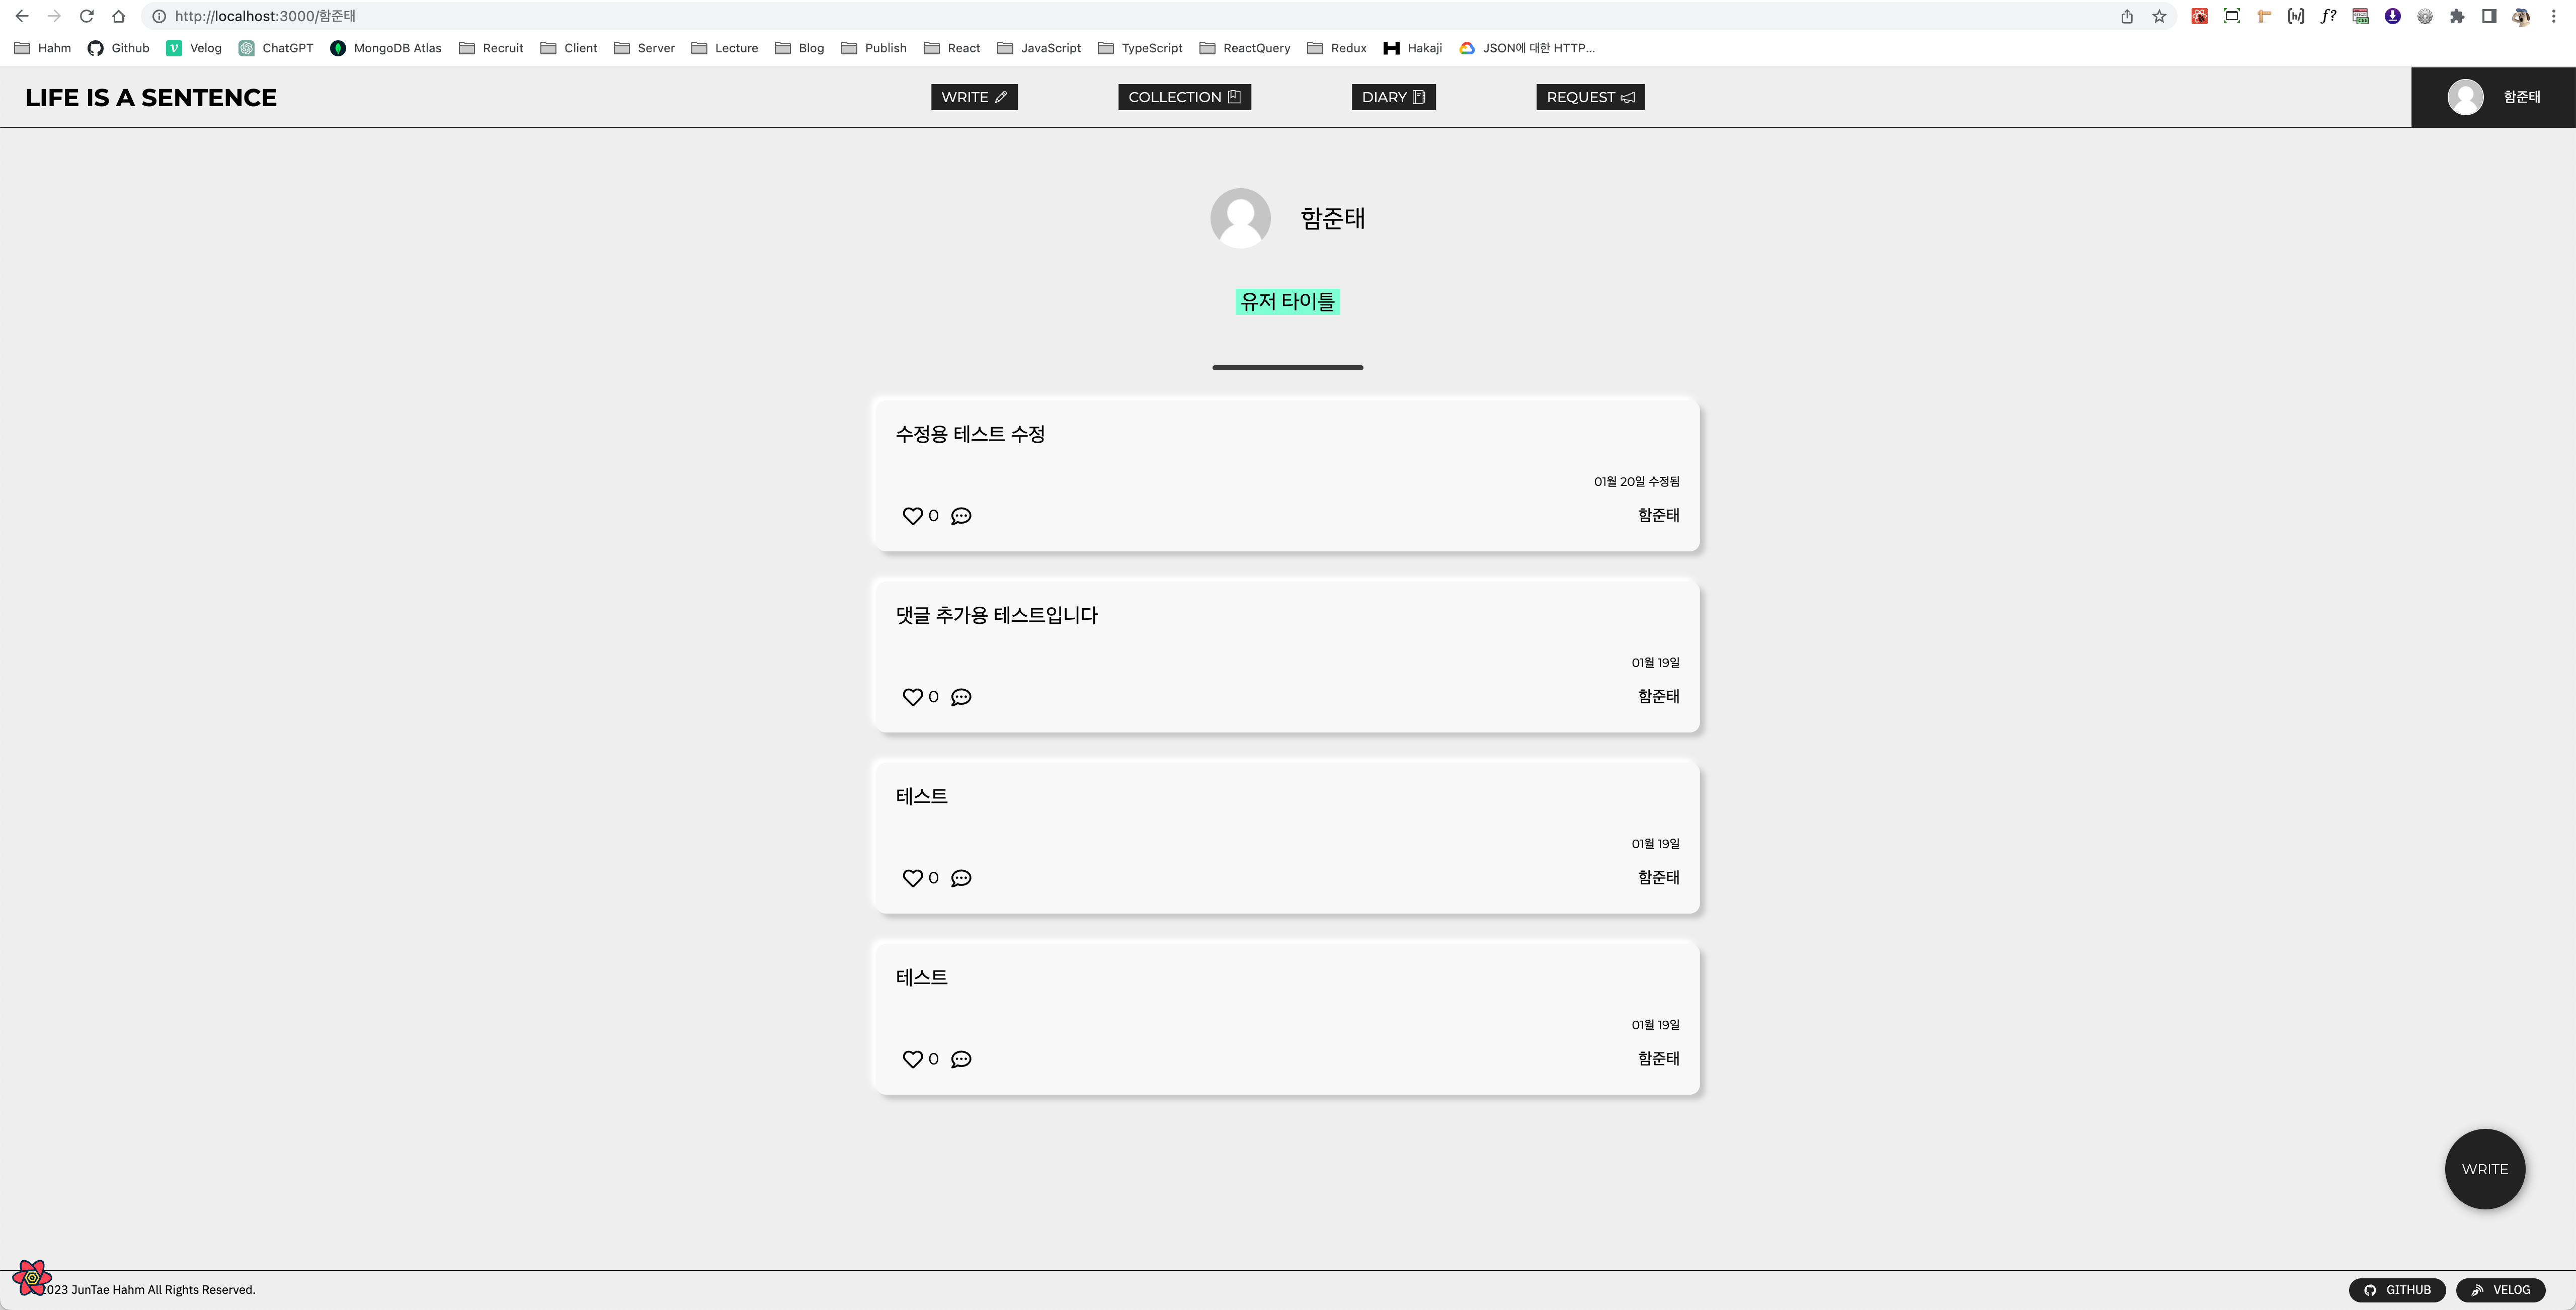
const { userPosts, error } = useGetUserPosts(params.user);user페이지에서 useGetUserPosts라는 함수에 params.user를 매개변수로 보내 실행시키면
export const useGetUserPosts = (userName) => {
const { data, error } = useQuery(
['userPosts'],
async () => {
return await axios
.get(`/api/allposts/${userName}`)
.then((res) => {
return res.data;
})
.catch((error) => {
console.log(error);
});
},
{
cacheTime: Infinity, // 캐싱 시간
refetchInterval: Infinity, // 리패치시간
},
);
let userPosts = [];
for (let key in data) {
userPosts.push({
postTitle: data[key].postTitle,
postId: data[key].postId,
postDate: data[key].postDate,
postUpdateDate: data[key].postUpdateDate,
postUser: data[key].postUser,
postLike: data[key].postLike,
comments: data[key].comments,
});
}
return { userPosts, error };
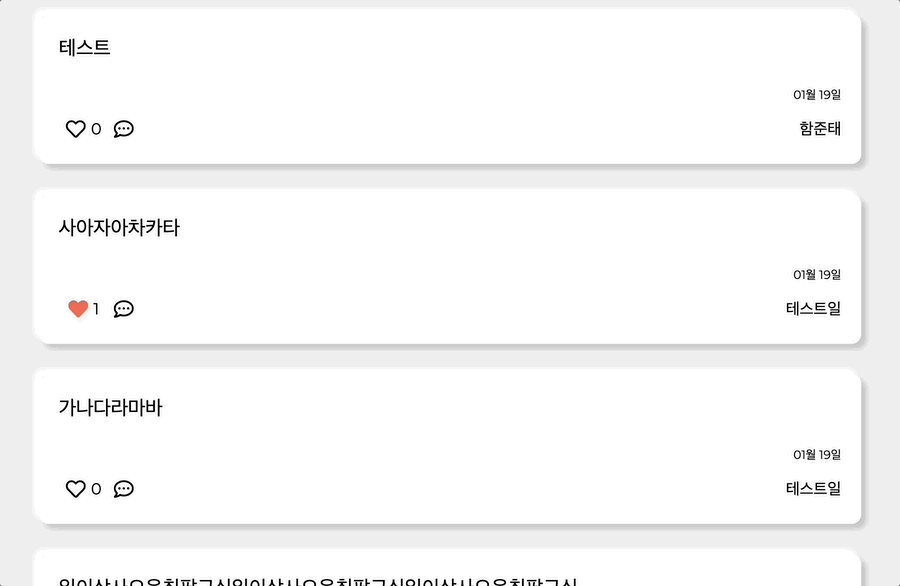
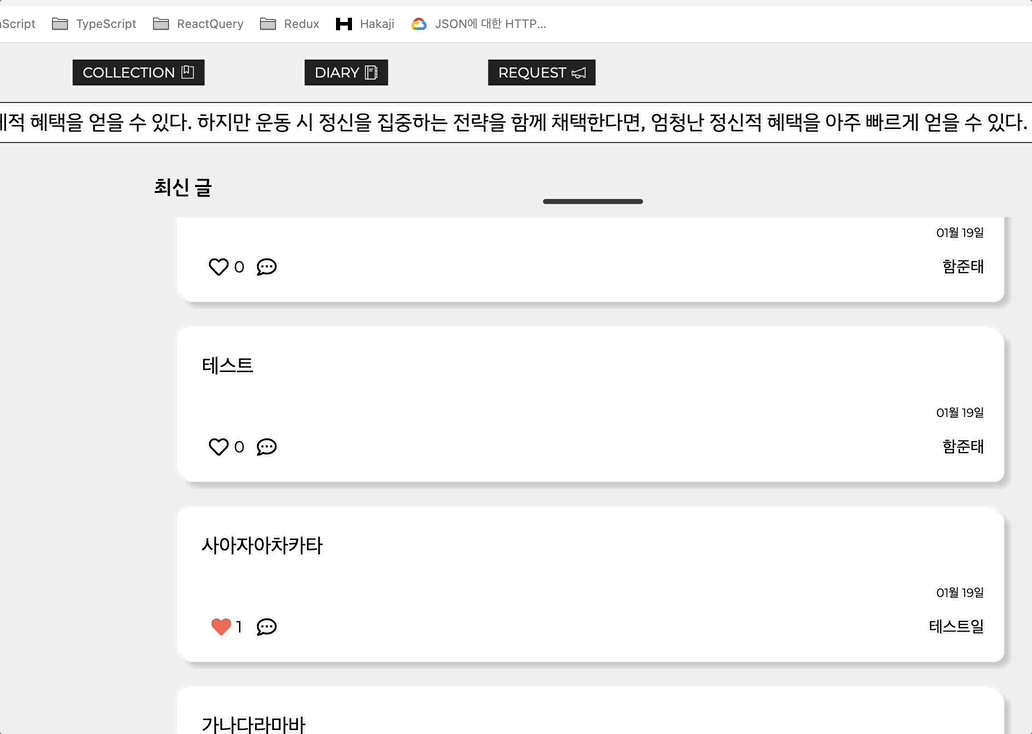
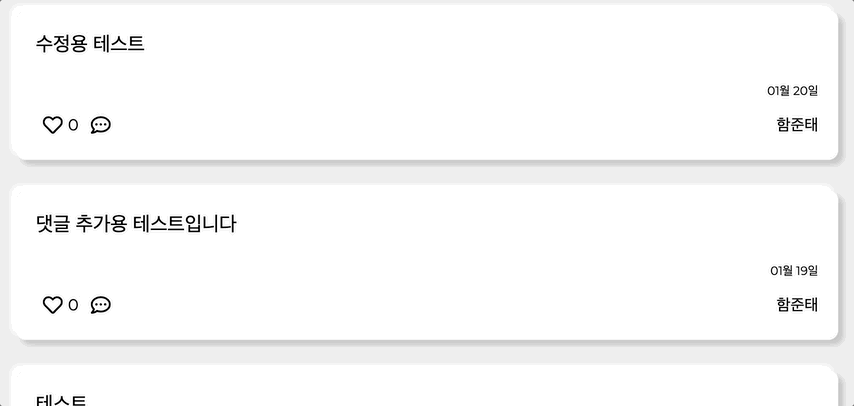
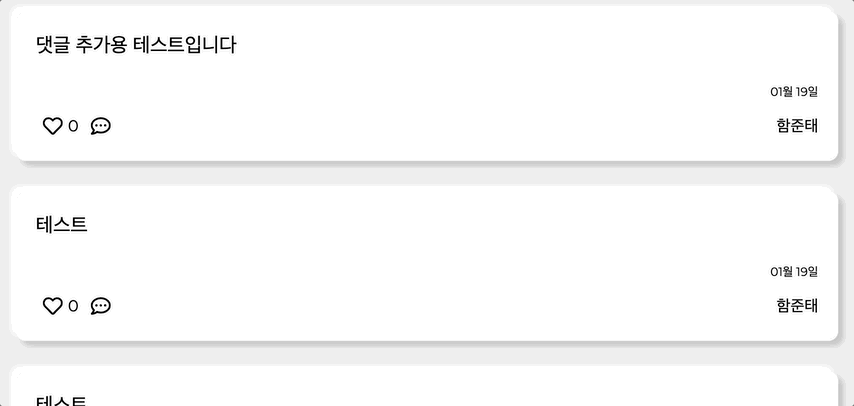
};userPosts에는 해당 user의 글만 저장된 데이터를 반환한다.
그 데이터로 map함수를 통해 post리스트를 렌더링 해준다.
userPosts.length === 0 ? (
  <NoPost>작성한 글이 없습니다.</NoPost>
) : (
  userPosts.map((data, i) => (
    <PostList
      key={i}
      postId={data.postId}
      postTitle={data.postTitle}
      postUser={data.postUser}
      postDate={data.postDate}
      postUpdateDate={data.postUpdateDate}
      postLike={data.postLike}
    />
  ))
)
해당 유저가 작성한 글이 없을 경우 작성한 글이 없다고 보여준다.