👉 authorization code grant 인증
authorization code grant 방식으로 로그인을 하는 방법을 사용해보기 위해서 플랫폼(?)에서 제공하는 외부 API(소셜 로그인)를 이용해 인증하는 것을 실습해보기로.
외부 API로는 구글과 카카오 로그인을 사용해보았다.
authorization code grant 방식의 인증을 하는 전체적인 logic은 다음과 같다.
각 api 별로 요청하는 format이 다를 수는 있지만 전체적인 큰 틀은 모두 동일하고 세부적인 차이점에 대해서는 api 별 document에서 확인할 수 있다.
👉 google login api
google login api 는 google cloud platform에서 제공받을 수 있다.
✏️ 시작하기 전에
login api를 사용하기 앞서 먼저 project을 생성해준다.
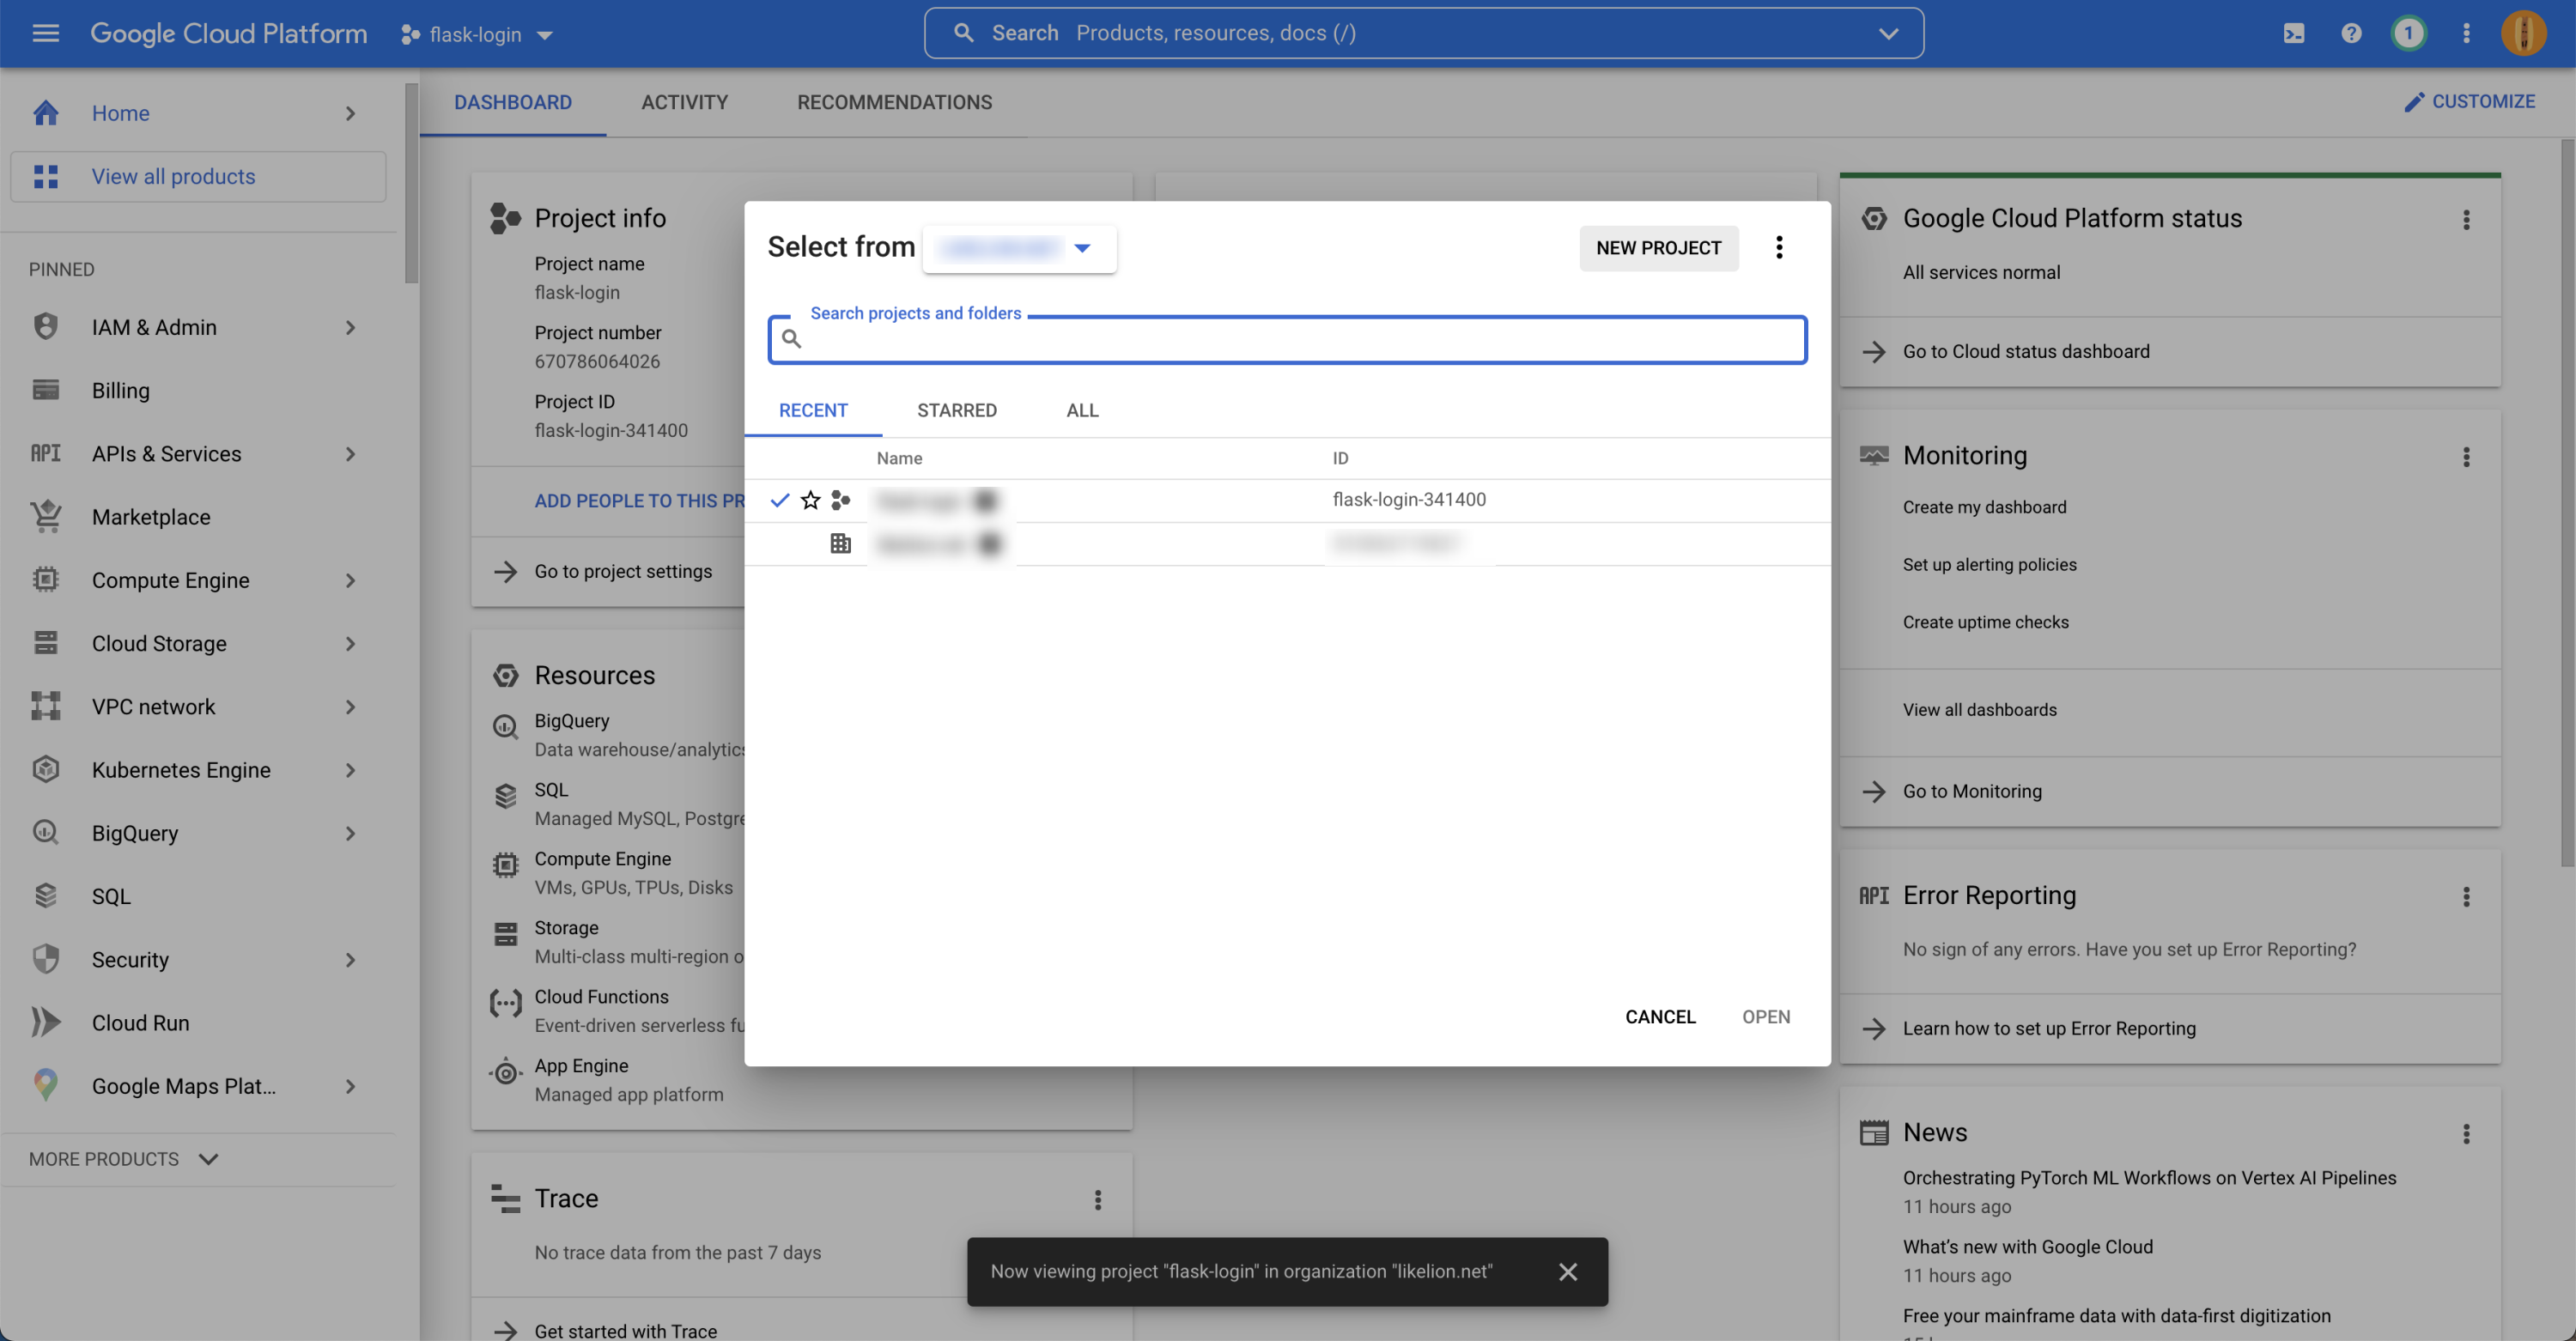
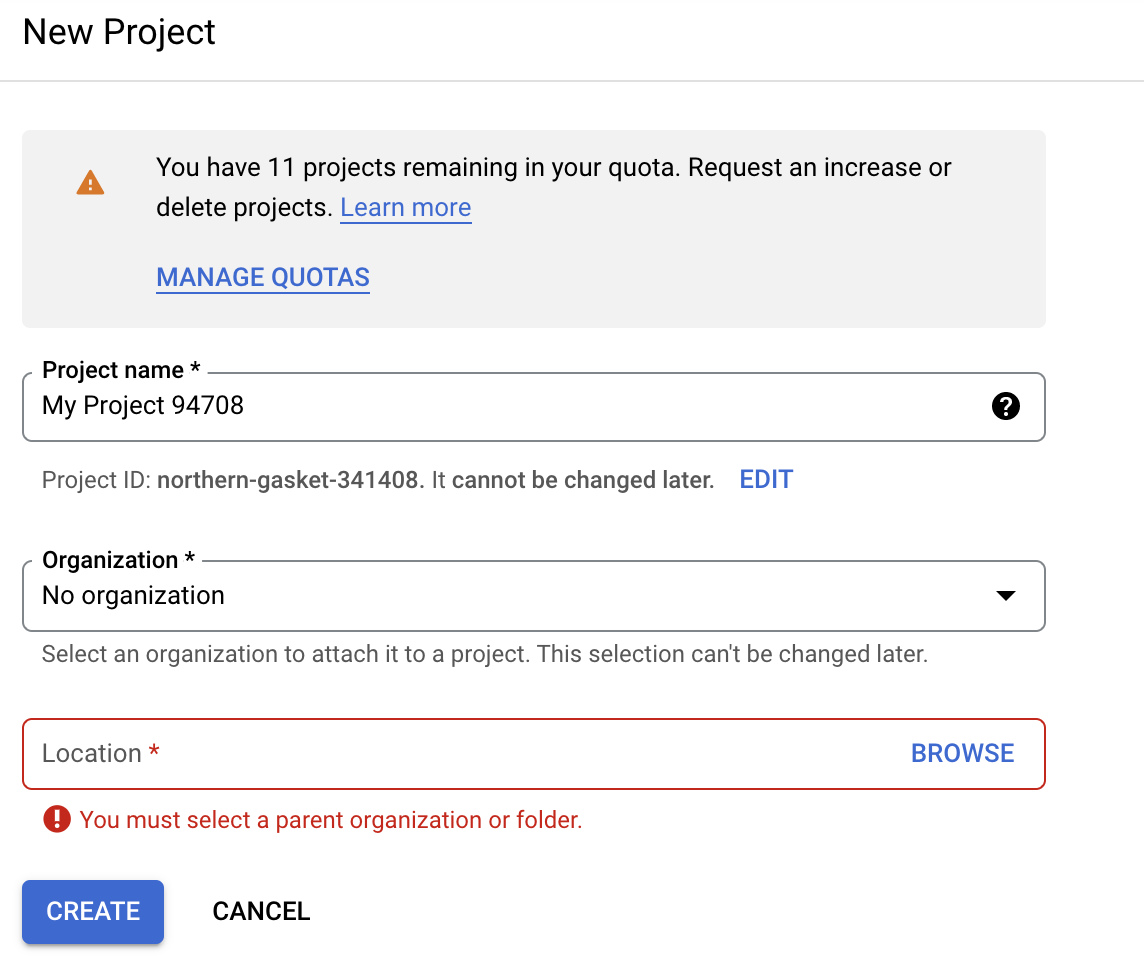
NEW PROJECT 눌러서 필요 값들을 입력해준 후 CREATE를 통해 project를 생성해준다.
✏️ 설정하기
login api에 관한 정보는 APIs & Servies에서 설정할 수 있다.
-
client_id와client_secret발급받고redirect_URI설정하기
Credentials > create credentials > OAuth 2.0 Client ID 에서 발급과 설정이 가능하다.
flask를 사용할 것이기 때문에 application type은 "Web application"으로 설정하고, 이름은 아무값이나 넣어주면 된다.
redirect_URI는 Authorized redirect URIs에서 callback으로 사용할 주소의 값을 추가해주면 된다.
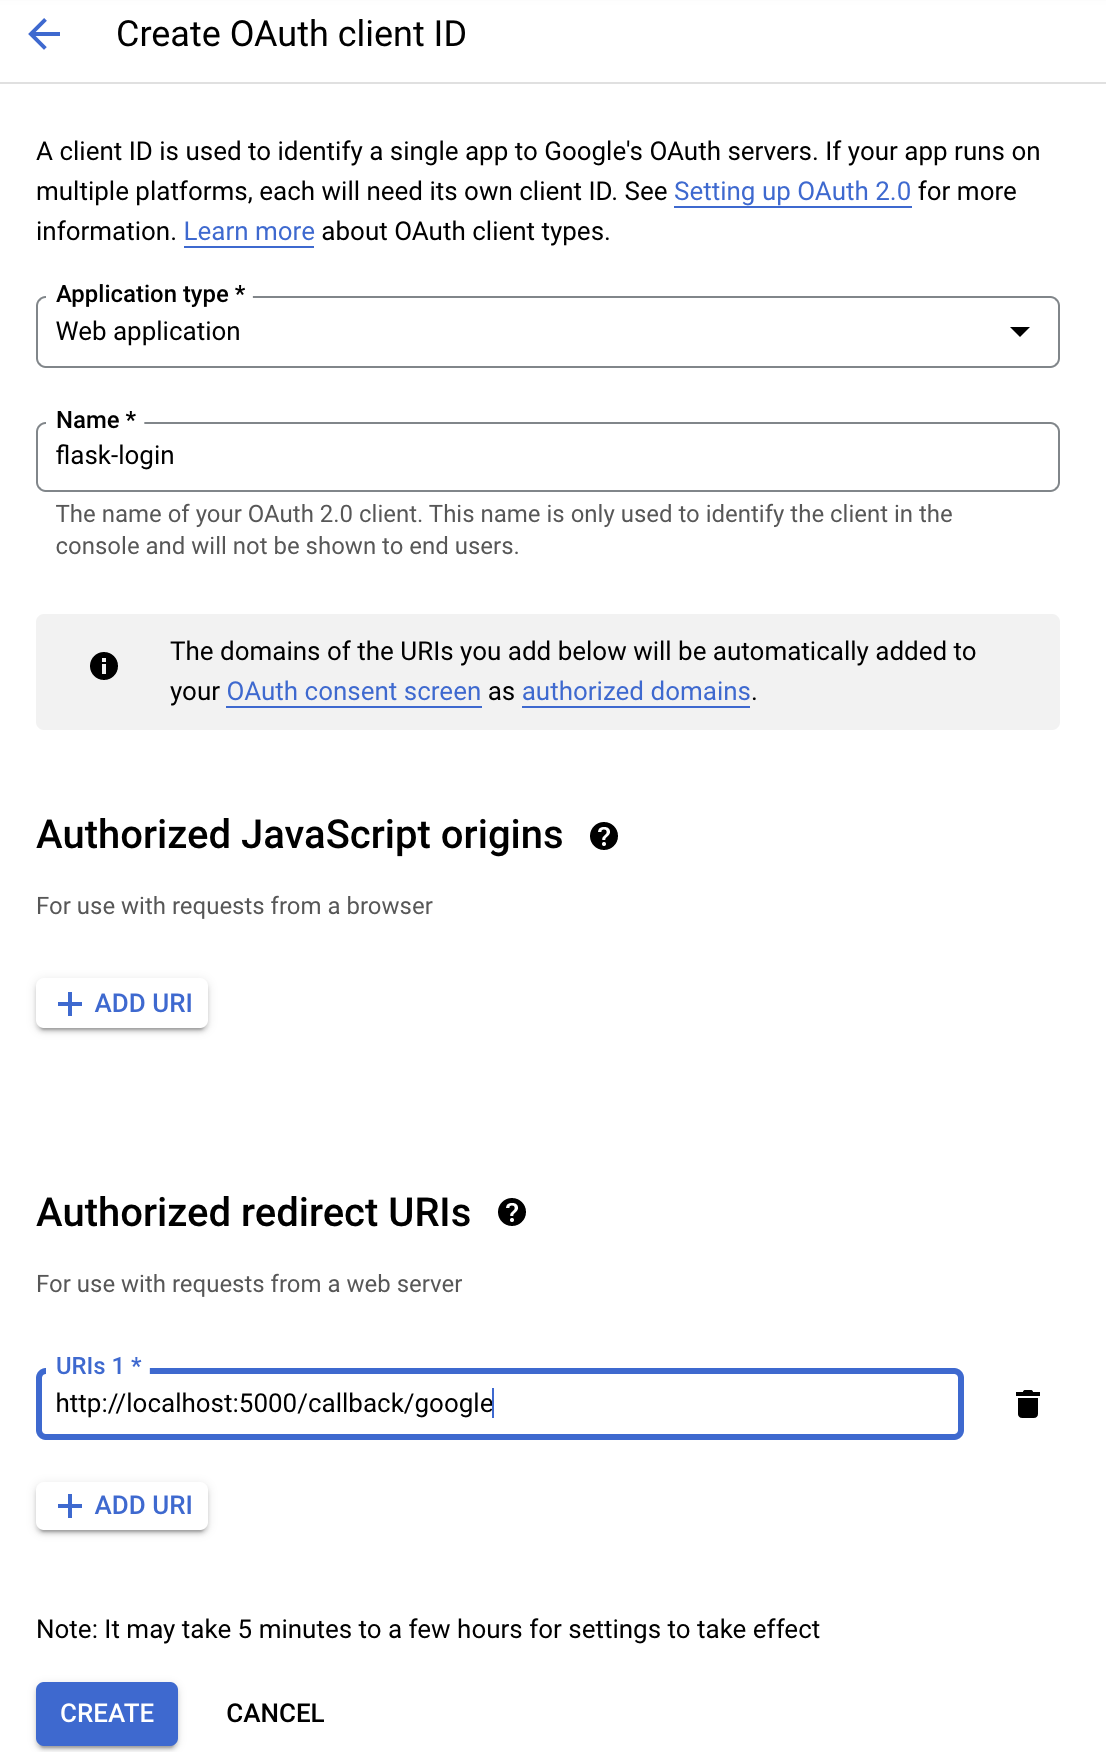
필요한 값을 모두 입력하고CREATE를 눌러 생성하면,
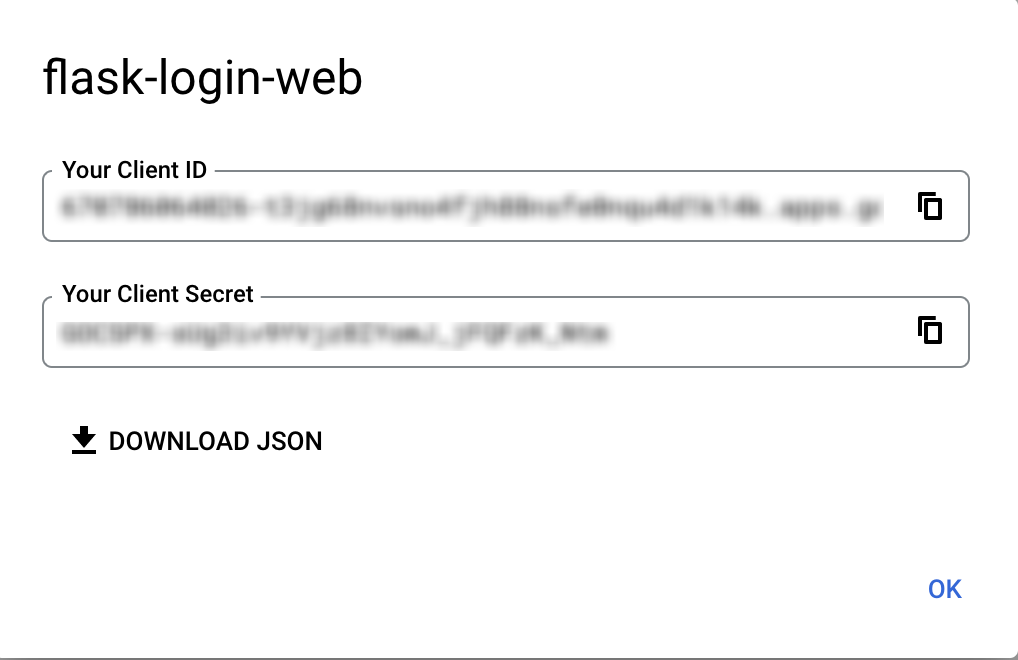
client_id와client_secret이 발급되며 해당 값을 JSON으로 다운로드 받을 수 있다. -
scope설정하기
OAuth consent screen 에서 이용할 권한(scope)에 대한 설정이 가능하다.
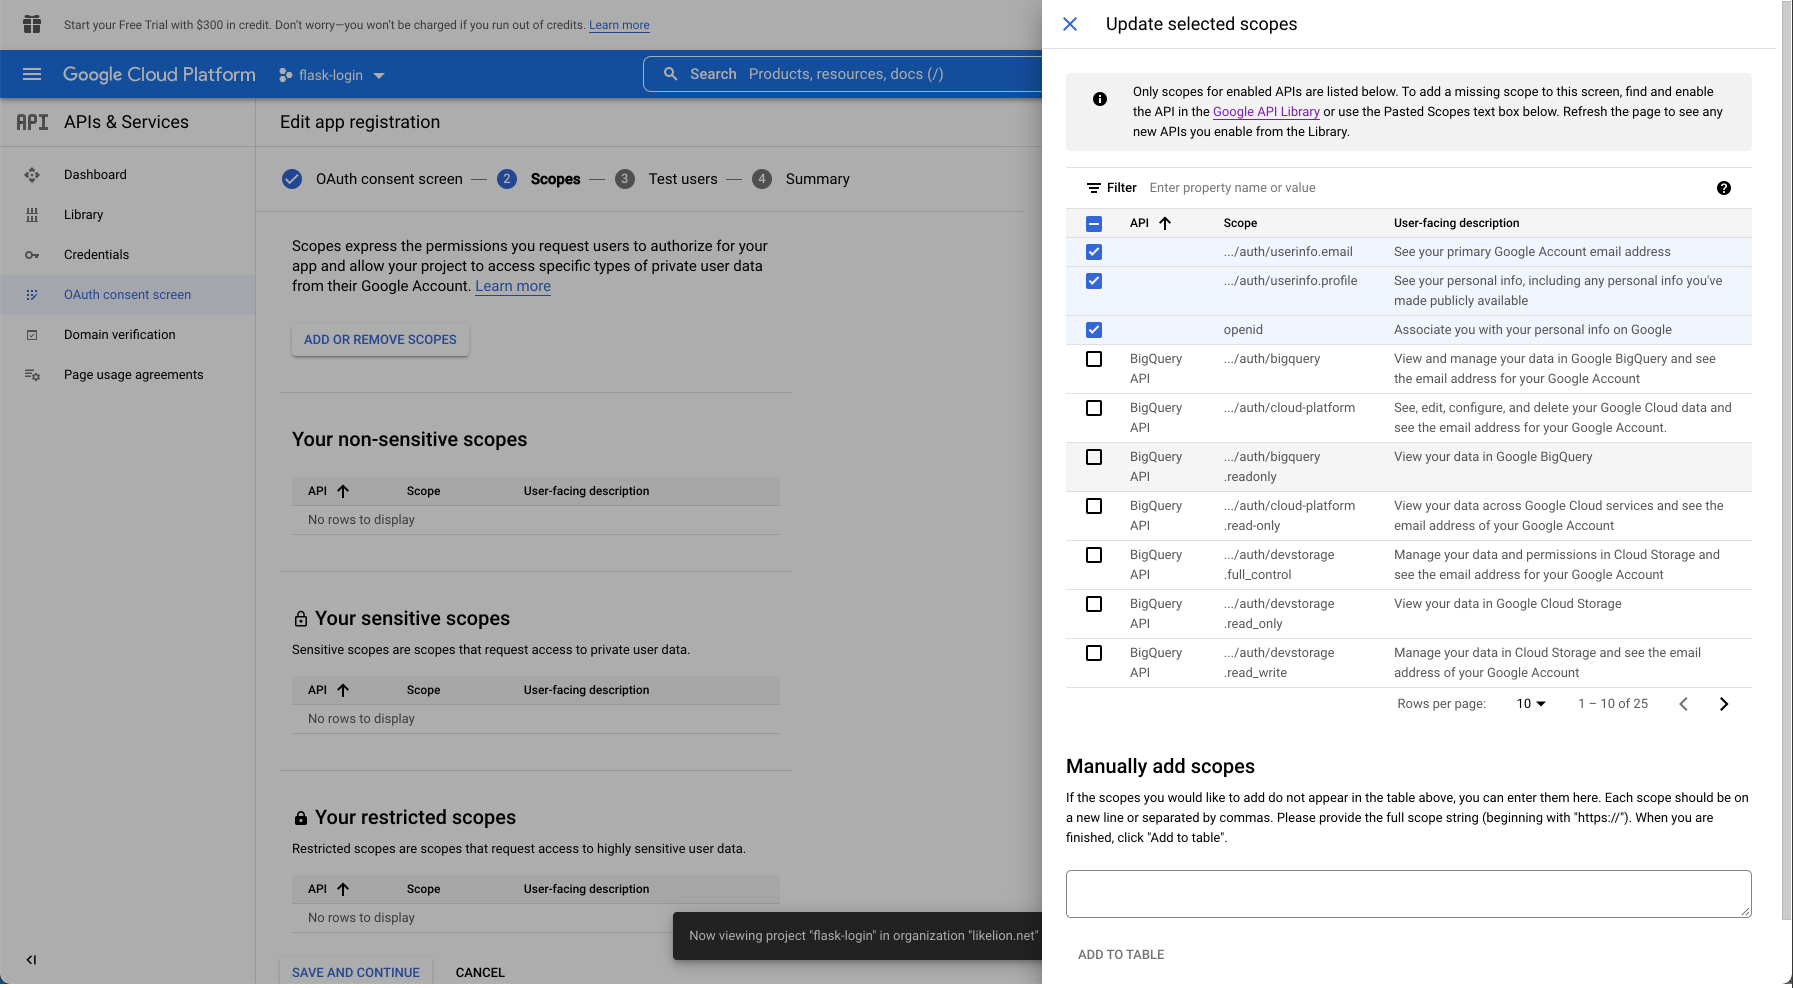
ADD or REMOVE SCOPES를 눌러 사용할 권한들을 선택해주면, 간단하게 scope를 설정할 수 있다.
✏️ 사용하기
설정이 완료되었다면 사용은 간단하다.
authorization code grant 방식의 인증에서의 logic을 그대로 구현하는데, 다만 AUTHORIZE_ENDPOINT와 TOKEN_ENDPOINT를 구글의 것으로 사용하기만 하면 된다.
authorization code받아오기
AUTHORIZE_ENDPOINT로client_id,redirect_uri,scope그리고response_type은 "code"로 해서 사용자를 보내주면authorization code를 받아올 수 있다.
이 때, 각 필요 요소의 값은 json이 아닌 form 방식으로 전송해주어야 한다.
@auth.route('/login/authorize/<target>', methods=['GET'])
def authorize(target):
    # authorization code 받아오기
    if target not in ['google', 'kakao']:
        # error 발생시키기
        return abort(404)

    target = str.upper(target)

    authorize_endpoint = current_app.config.get(f'{target}_AUTHORIZE_ENDPOINT')
    client_id = current_app.config.get(f'{target}_CLIENT_ID')
    redirect_uri = current_app.config.get(f'{target}_REDIRECT_URI')
    response_type = "code"
    scope = current_app.config.get(f'{target}_SCOPE')

    query_string = urlencode(dict(
        redirect_uri=redirect_uri,
        client_id=client_id,
        scope=scope,
        response_type=response_type
    ))

    authorize_redirect = f'{authorize_endpoint}?{query_string}'

    return redirect(authorize_redirect)
access token받아오기
authorization code를 받고나서는 요청할 때 같이 보낸redirect_uri(= callback 주소)의 값으로 돌아온다.
받은authorization code의 값을 request에서 받아온 뒤,TOKEN_ENDPOINT로client_id,client_secret,redirect_uri그리고 "authorization_code"의 값을 가지는grant_type을 form 방식으로POST해 주면 응답으로access token을 받을 수 있다.
@auth.route('/oauth/callback/google', methods=['GET'])
def google_callback():
    code = request.args.get('code')
    token_endpoint = current_app.config.get('GOOGLE_TOKEN_ENDPOINT')
    client_id = current_app.config.get('GOOGLE_CLIENT_ID')
    client_secret = current_app.config.get('GOOGLE_CLIENT_SECRET')
    redirect_uri = current_app.config.get('GOOGLE_REDIRECT_URI')
    grant_type = 'authorization_code'

    resp = requests.post(token_endpoint, data=dict(
        code=code,
        client_id=client_id,
        client_secret=client_secret,
        redirect_uri=redirect_uri,
        grant_type=grant_type
    ))
response 👇

👉 kakao login api
kakao login api의 사용과 공식 문서는 kakao developers에서 찾아볼 수 있다.
✏️ 시작하기 전에
kakao developers에서 문서에 들어갔다면 시작하기 > 애플리케이션 등록 > 내 애플리케이션에서 애플리케이션을 추가해준다.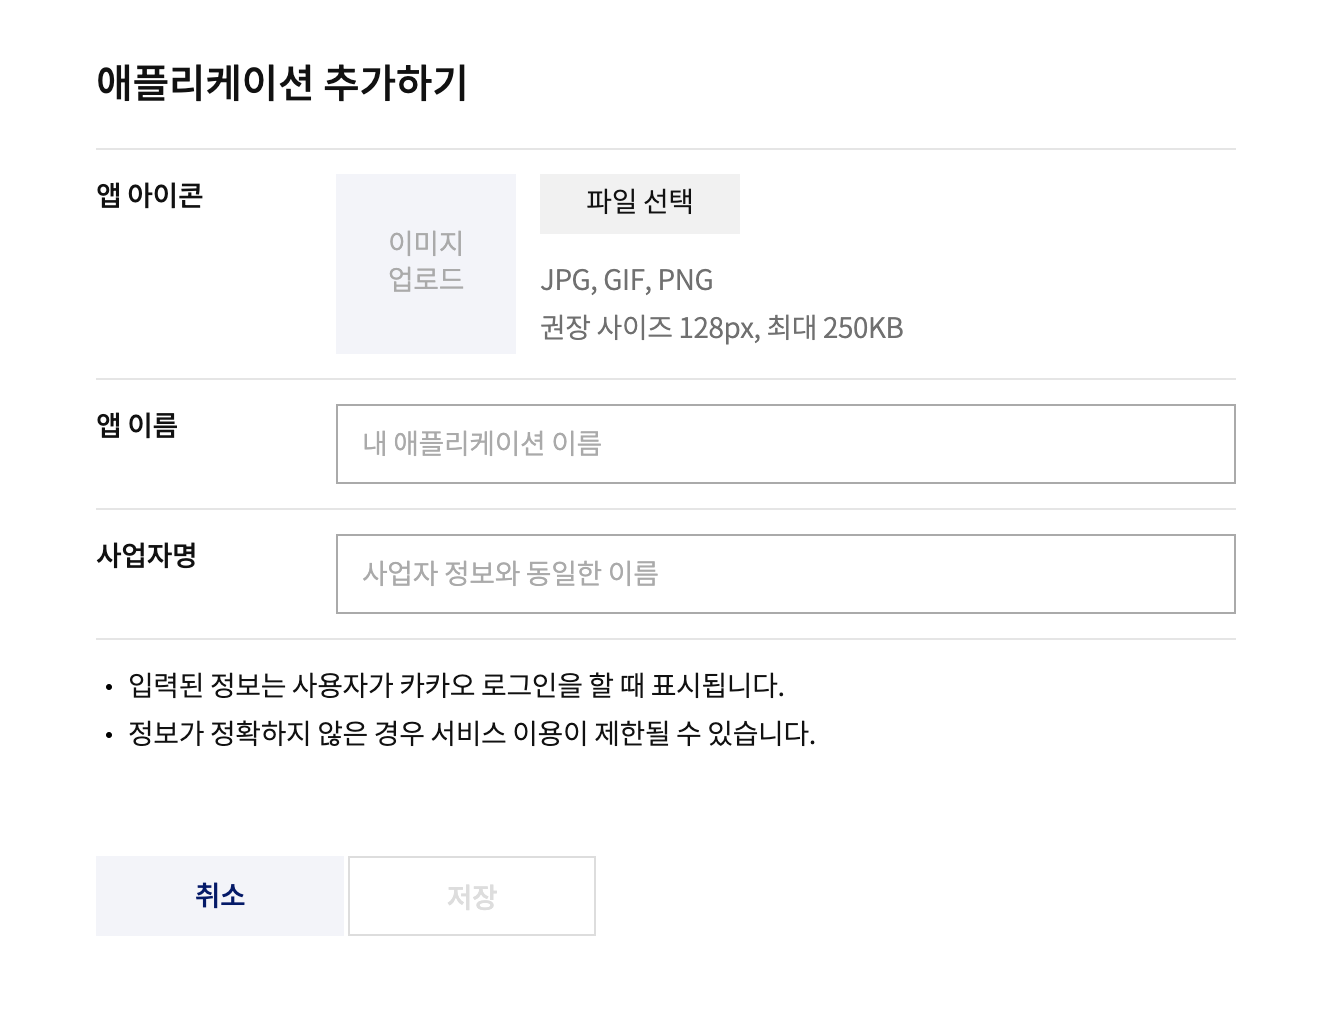
✏️ 설정하기
-
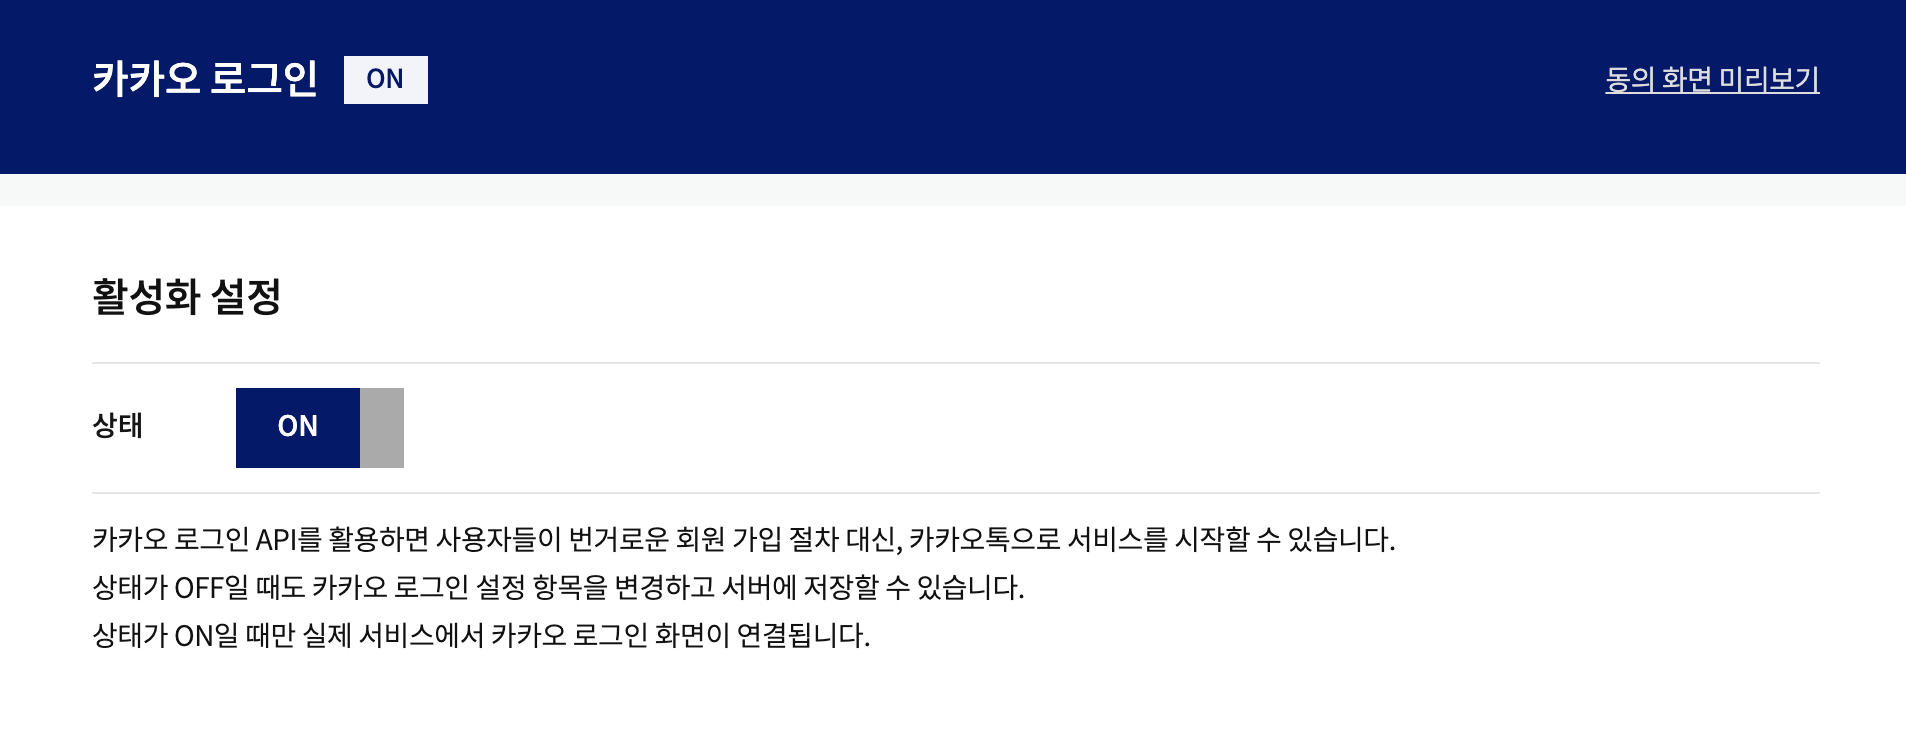
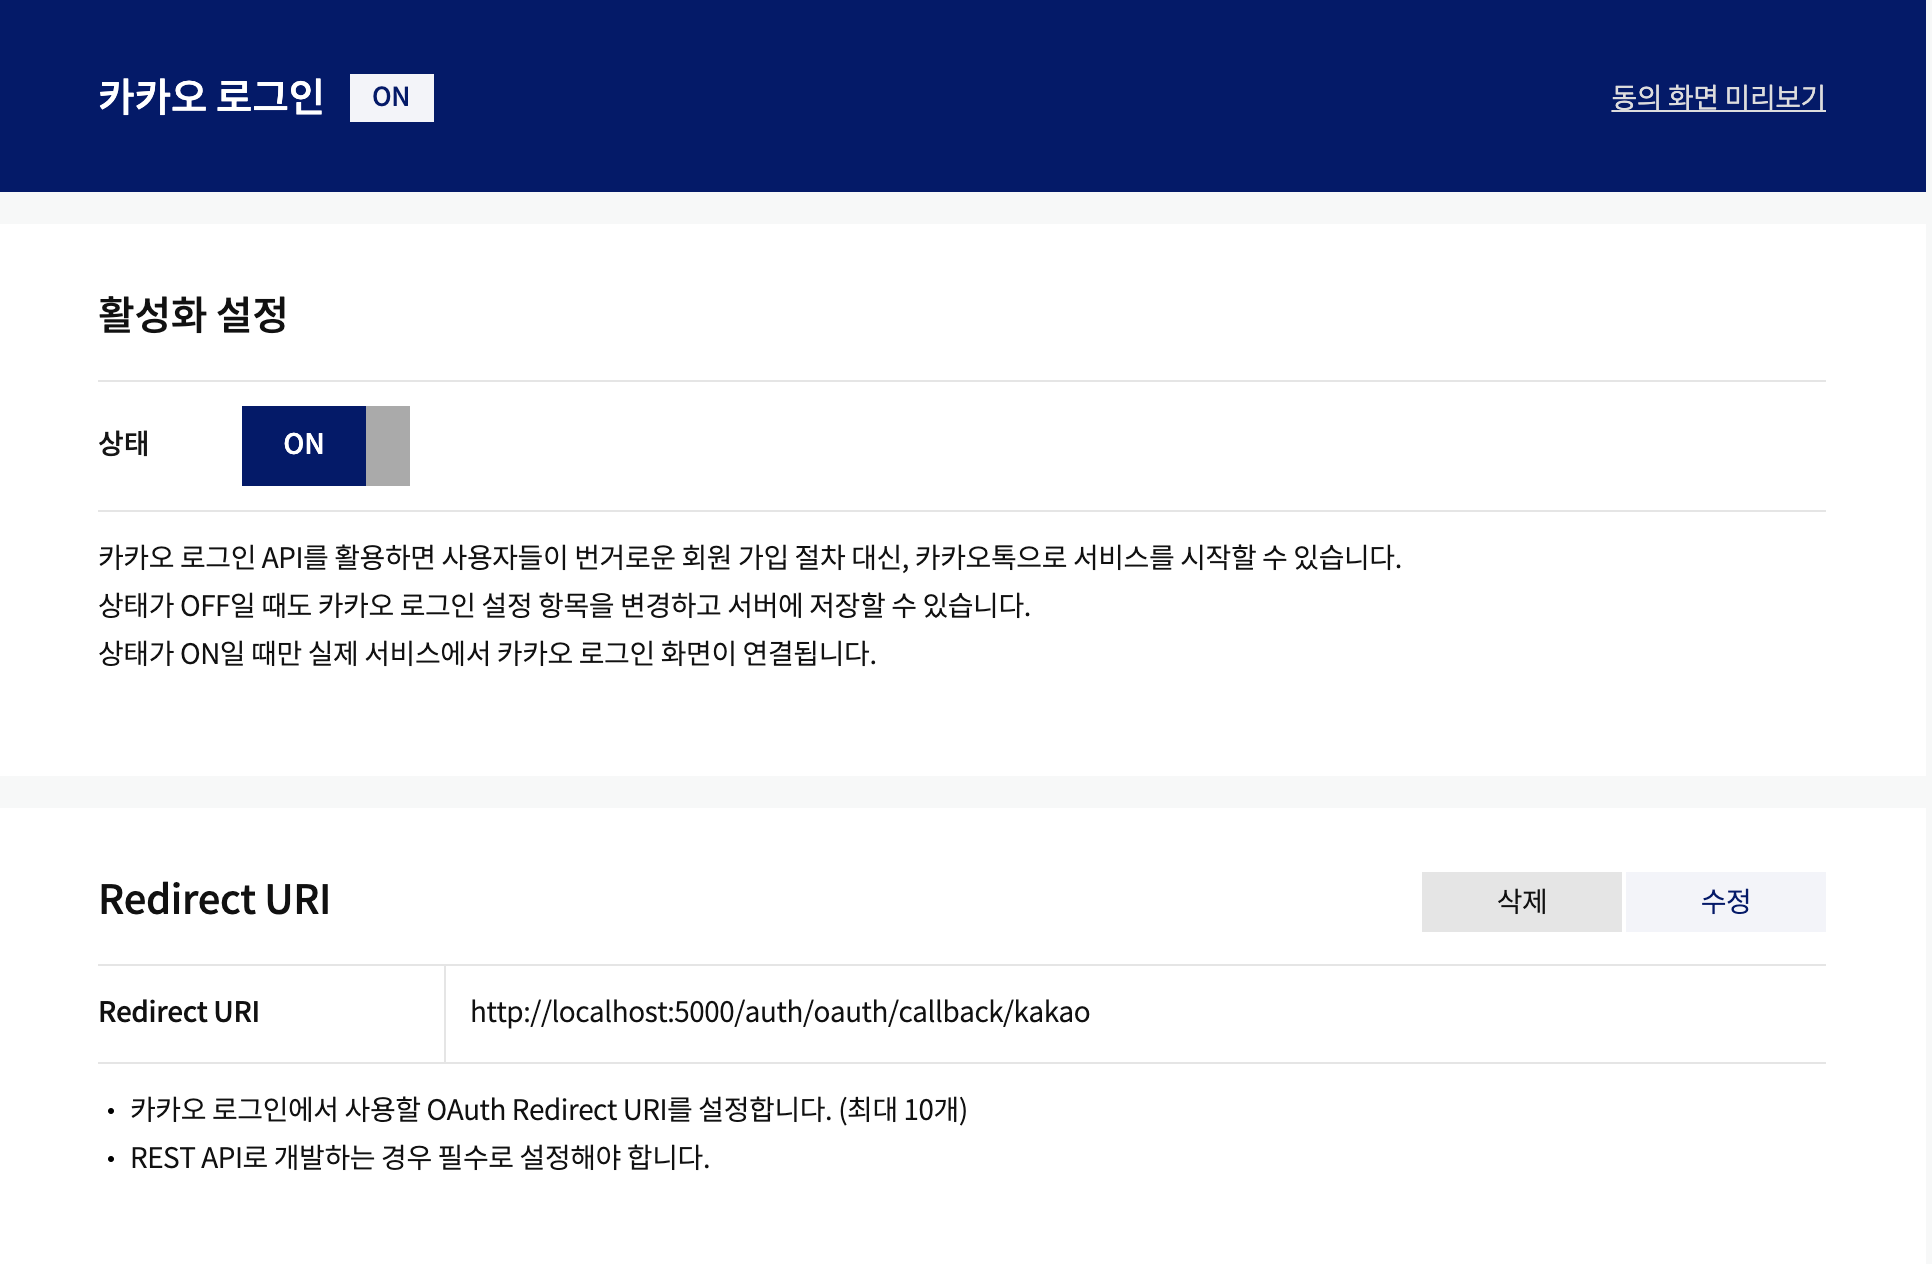
카카오 로그인 활성화
애플리케이션을 등록해두어도 카카오 로그인을 활성화해놓지 않으면 서비스가 연결되지 않으니 활성화하는 것을 잊지 않도록 한다.
-
client_id값 확인하기
애플리케이션이 생성되면 일단 key값들이 발급된다.

이 중 REST API 키의 값이client_id의 값이다. -
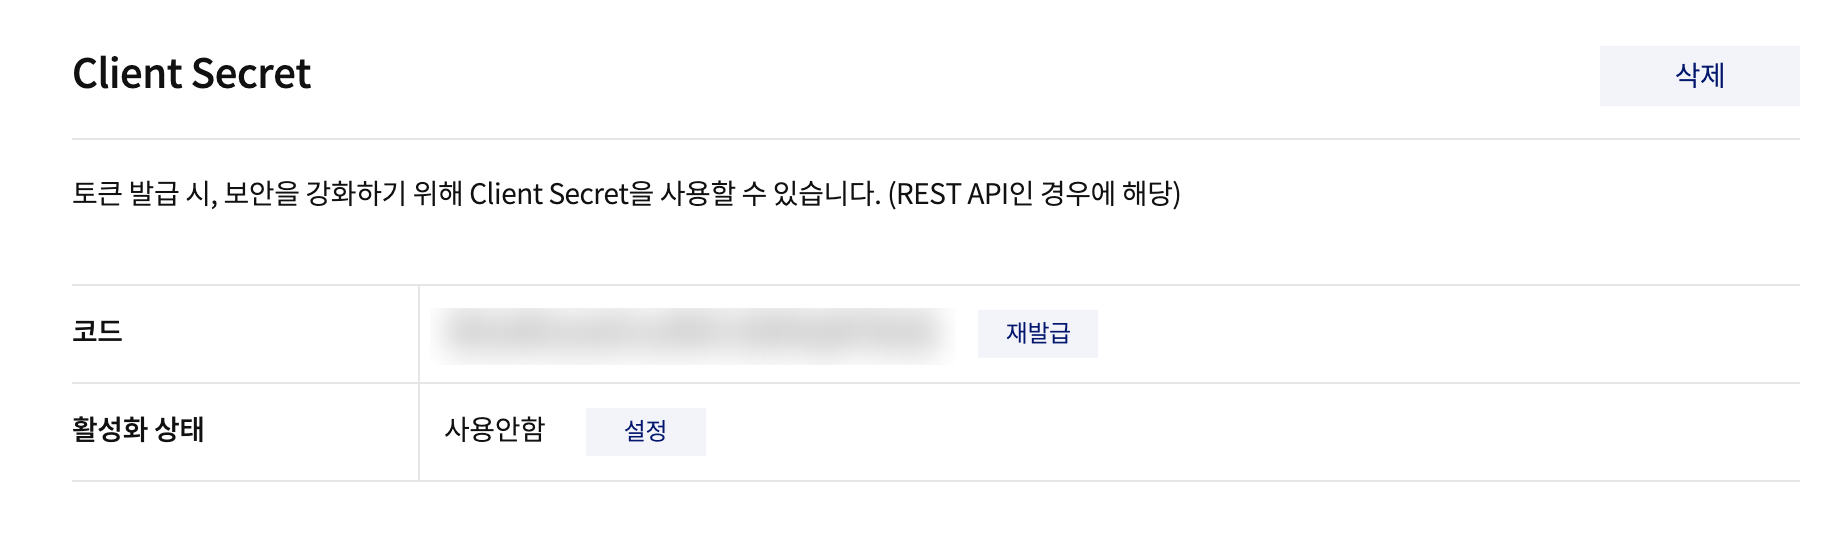
client_secret발급받기
내 애플리케이션 > 제품 설정 > 카카오 로그인 > 보안에서client_secret을 발급받을 수 있다.
client_secret은 발급받지 않을 경우 access token을 요청할 때 설정하지 않아도 되지만 발급 받아 ON 상태가 된 경우에는 필수적으로 access token 요청 시 전달해줘야한다.
REST API(web)에서 사용할 때에는 보안상client secret을 발급 받아야한다.
-
redirect_uri등록하기
내 애플리케이션 > 제품 설정 > 카카오 로그인에서authorization code를 받은 후 돌아올 callback 주소인redirect_uri를 등록할 수 있다.
-
scope설정하기
내 애플리케이션 > 제품 설정 > 카카오 로그인 > 동의항목에서 권한에 대한 정보를 수정할 수 있다.
선택한 동의 항목의ID값이scope에 해당하는 값이 된다.
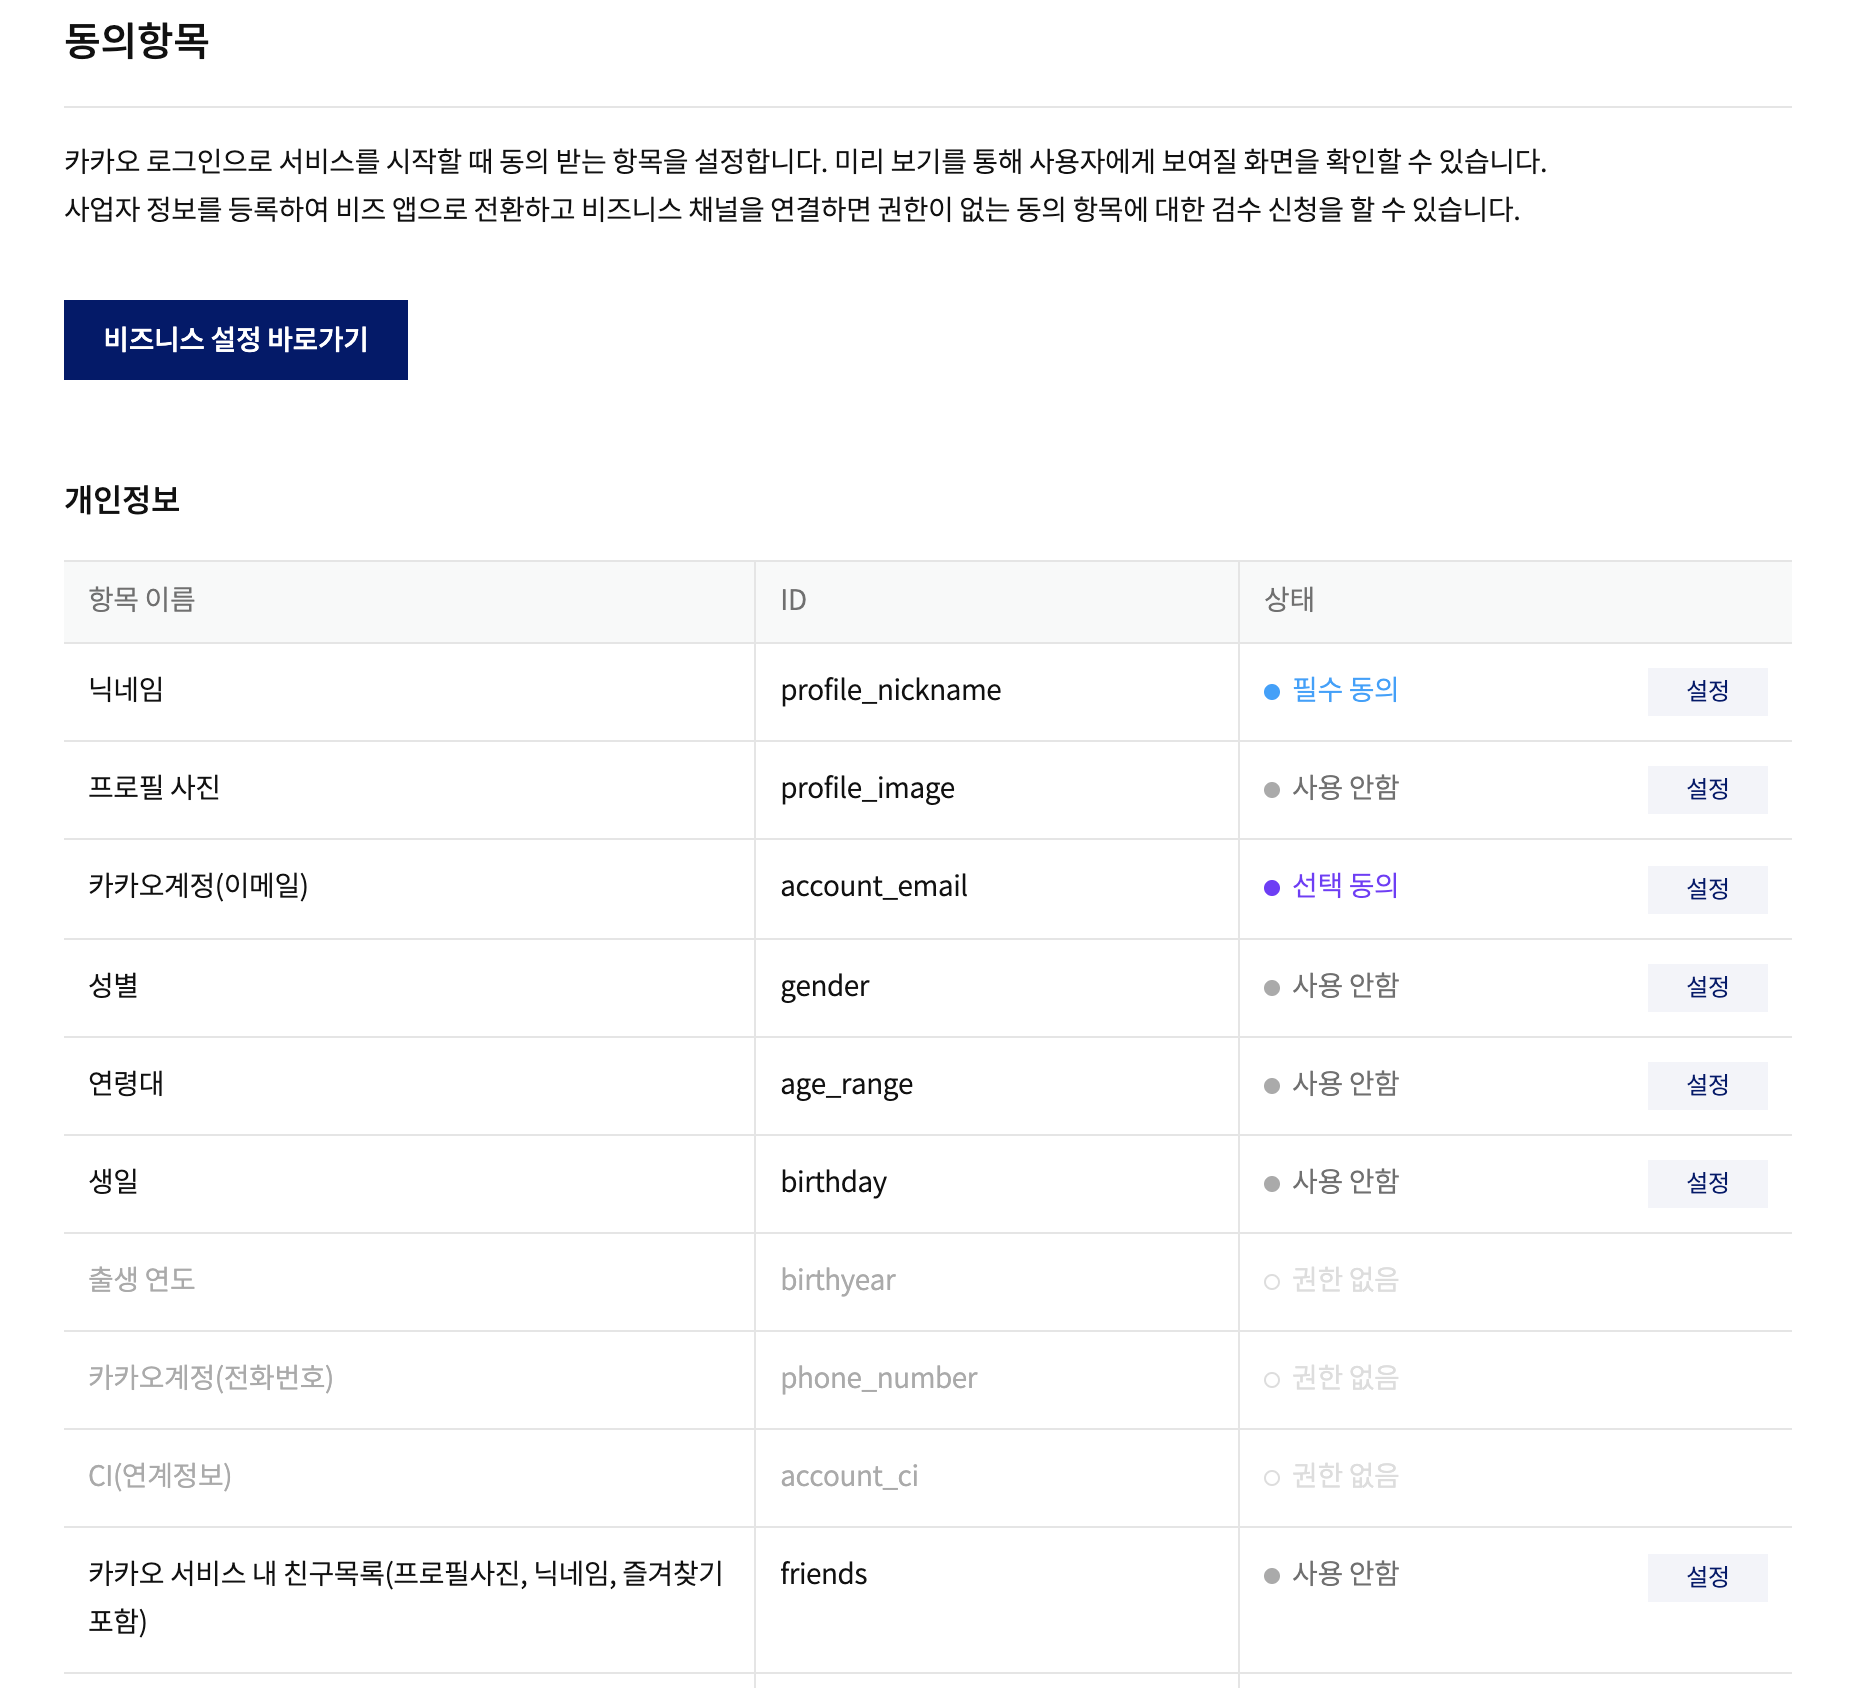
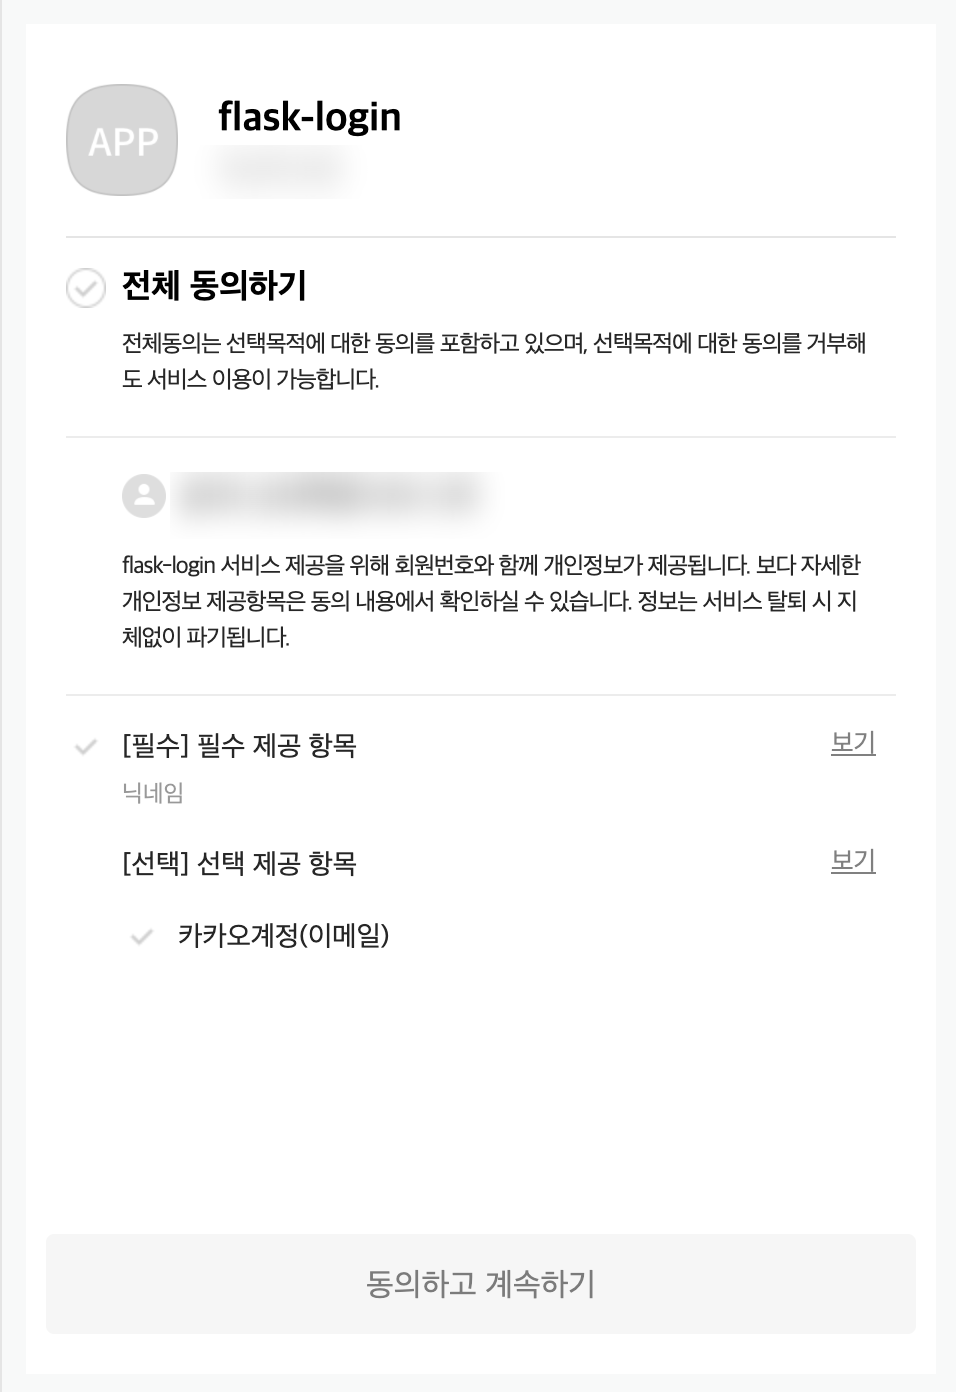
"동의 화면 미리보기"를 통해서 사용자에게 어떻게 화면이 뜨는지 확인도 가능하다.
✏️ 사용하기
사실상 위의 google login api와 사용법에 차이가 없다.
AUTHORIZE_ENDPOINT와 TOKEN_ENDPOINT의 값을 카카오의 것으로 바꾸어 동일한 작업을 하면 kakao login api를 사용할 수 있다.
1. authorization code 받아오기
@auth.route('/login/authorize/<target>', methods=['GET'])
def authorize(target):
    # authorization code 받아오기
    if target not in ['google', 'kakao']:
        # error 발생시키기
        return abort(404)

    target = str.upper(target)

    authorize_endpoint = current_app.config.get(f'{target}_AUTHORIZE_ENDPOINT')
    client_id = current_app.config.get(f'{target}_CLIENT_ID')
    redirect_uri = current_app.config.get(f'{target}_REDIRECT_URI')
    response_type = "code"
    scope = current_app.config.get(f'{target}_SCOPE')

    query_string = urlencode(dict(
        redirect_uri=redirect_uri,
        client_id=client_id,
        scope=scope,
        response_type=response_type
    ))

    authorize_redirect = f'{authorize_endpoint}?{query_string}'

    return redirect(authorize_redirect)
access token받아오기
@auth.route('/oauth/callback/kakao', methods=['GET'])
def kakao_callback():
code = request.args.get('code')
token_endpoint = current_app.config.get('KAKAO_TOKEN_ENDPOINT')
client_id = current_app.config.get('KAKAO_CLIENT_ID')
client_secret = current_app.config.get('KAKAO_CLIENT_SECRET')
redirect_uri = current_app.config.get('KAKAO_REDIRECT_URI')
grant_type = 'authorization_code'
resp = requests.post(token_endpoint, data=dict(
code=code,
client_id=client_id,
client_secret=client_secret,
redirect_uri=redirect_uri,
grant_type=grant_type
))
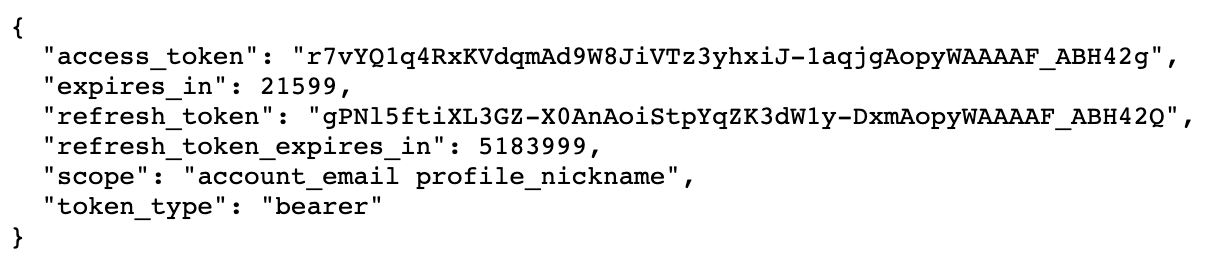
# return code
return resp.json()response 👇
google login api와는 다르게 kakao login api는 open id에 대한 권한을 제공해주지 않기 때문에, 사용자에 대한 정보를 얻고 싶다면 발급 받은 access token을 이용하여 요청해야한다.