Photo by Christopher Gower on Unsplash
SDK 개발을 협업으로 진행하면서 Code Convention을 지키지는 것이 어려웠다. 구두로 convention을 공유하다 보니 매번 정확한 convention을 지키기 힘들었다.
그래서 앞으로 개발 과정에서 Java Code Convention을 지키기 위해 checkstyle java lint 를 도입하기로 했다.
추가로 SDK의 품질 관리를 위해 Android Lint도 적용하기로 했다. 매 commit 마다 두 task가 자동 실행되며, 둘 중 하나에서라도 error가 발생하면 commit 이 fail 되도록 하고 싶었다.
열심히 구글링하다 보니 git hooks의 pre-commit을 사용하면 커밋 전에 특정 작업을 수행할 수 있다는 것을 알게 되었다.
git hook의 pre-commit을 이용해 commit 할 때마다 Android Lint 검사와 Checkstyle java lint 검사를 수행하게 만들자. 그리고 검사를 통과하면 커밋되도록 해보자.
만약 검사를 실패하면 검사 결과가 기록된 report html 파일을 브라우저로 띄워보자!
먼저 CheckStyle 설정 방법을 알아보고, 그 다음엔 Android Lint 적용 방법을 알아볼 것이다.
그리고 마지막으로 git hook pre-commit 을 이용해 두 작업을 묶어 볼 것이다.
CheckStyle
Plugin 설정
먼저 checkstyle 을 이용하려면 rootProject/build.gradle 파일에 아래와 같이 checkstyle 플러그인을 추가해야 한다.
그리고 checkstyle 버전 확인을 위해 println checkstyle.toolVersion 을 추가하자.
plugins {
    id('checkstyle')
}

println checkstyle.toolVersion
그럼 프로젝트를 빌드할 때마다 아래 사진과 같이 checkstyle 버전이 출력된다.

CheckStyle XML 파일 다운로드
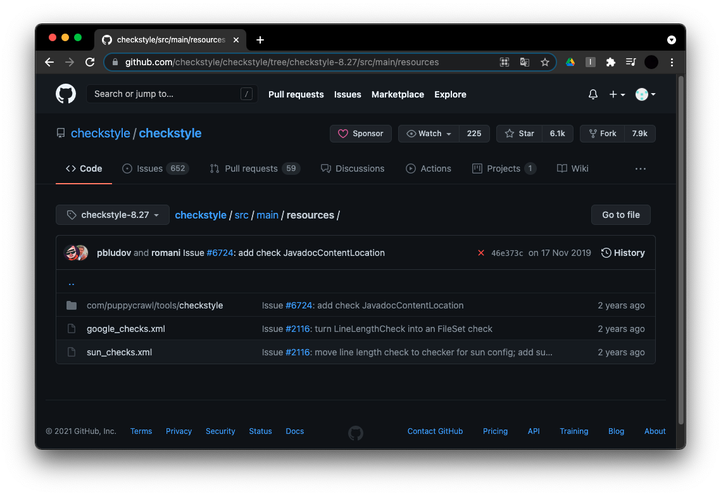
checkstyle 버전을 확인했으면, checkstyle github page에 들어가서 버전에 맞는 태그를 선택한다.
예시로 8.27 태그 선택 후 checkstyle/src/main/resources 폴더에 들어간다.
google_checks.xml과 sun_checks.xml이 있는데, 필자는 sun_checks.xml을 선택했다. (google_checks.xml은 Android Studio의 Default Code Style과 괴리가 있었다. tab 간격이 좁아서 코드를 보기에 답답하게 느껴졌다. 그래서 sun_checks.xml 을 선택했다.)
⚠️
rootProject/build.gradle에서 확인한checkstyle.toolVersion이 올라갈 때마다 checkstyle github page에서 새로운 태그를 선택해서 다시 resource 를 다운받아야 한다. 이 점이 귀찮긴 하다.
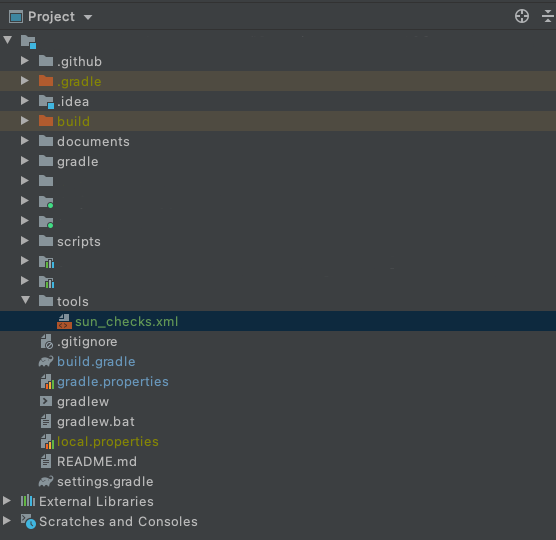
rootDir에 tools 라는 directory를 생성 후, 위에서 다운받은 sun_checks.xml 파일을 넣어준다.
sun_checks.xml 의 모든 규칙을 지키면서 코드를 작성할 필요는 없다. 필요에 맞게 sun_checks.xml 의 규칙을 주석처리해가며 Team의 Style에 맞게 바꾸면 된다.
Module에 CheckStyle Gradle Task 설정
module 별로 (app module 또는 library module) checkstyle task를 수행해야 하기 때문에 module/build.gradle 에 아래 코드를 입력해준다.
apply plugin: 'checkstyle'

task checkstyle(type: Checkstyle) {
    description 'Check code convention'
    group 'verification'
    configFile file("${rootDir}/tools/sun_checks.xml")		//sun_checks.xml의 경로
    source 'src/main/java/'                             	//검사 대상 디렉토리
    showViolations false
    include '**/*.java'
    classpath = files()
    ignoreFailures = false
}
Android Lint
Module에 Android Lint option 설정
module 별로 (app module 또는 library module) Android Lint 검사를 해야하기 때문에 module/build.gradle 에 아래 코드를 입력해준다. 모듈마다 무시해야 하는 규칙이 있으면 disable 항목에 해당 규칙을 추가해준다. lint 규칙 목록은 여기에서 확인할 수 있다.
android {

  lintOptions {
      // Turns off checks for the issue IDs you specify.
      disable 'ContentDescription', 'HardcodedText', 'GradleDependency'
      // if set to true (default), stops the build if errors are found.
      abortOnError false
  }
}
여기까지 checkstyle과 Android Lint 사용을 위한 준비과정이 끝났다. 이제 git hooks를 이용해 pre-commit 이 실행될때 자동으로 모듈별로 checkstyle, Android Lint가 적용되게 해보자.
git hooks
pre-commit 설정
project rootDir → .git → hooks path에 진입한다. hooks 폴더 안에 pre-commit 파일을 만들면 된다.
vi pre-commit command 를 실행해 새로운 script를 만들고 아래 코드를 넣어주면 된다. i를 눌러 INSERT 모드로 전환 후 아래 코드를 넣고, esc → shift + Z + Z 를 눌러서 저장한다. (아래 코드는 이 글을 참고했다.)
#!/bin/sh

red='\033[0;31;1m'
green='\033[0;32;1m'
noColor='\033[0m'

# for each module
projectDir=$(git rev-parse --show-toplevel)
lintProjects=("module-1" "module-2")

for project in ${lintProjects[@]}
do
    # Android lint check
    echo "-----------------Starting run android lint for ${project}-----------------"
    lintReportPath="${project}/build/reports/lint-results.html"

    for issueCount in $(./gradlew ${project}:lint 2>/dev/null | grep "Ran lint on variant" | egrep -o '[0-9]+')
    do
        if [ $issueCount -ne 0 ]
        then
            echo "${red}Failed, ${project} project has ${issueCount} lint issues!${noColor}"
            echo "Please refer file://${projectDir}/${lintReportPath}"
            open ${projectDir}/${lintReportPath}
            exit 1
        fi
    done
    echo "${green}Succeeded, no android lint issues found in ${project}${noColor}\n"

    # Checkstyle
    echo "-----------------Starting run android checkstyle for ${project}-----------------"
    checkstylePath="${project}/build/reports/checkstyle/checkstyle.html"

    ./gradlew ${project}:checkstyle >/dev/null
    checkstyleStatus=$?
    if [ $checkstyleStatus -ne 0 ]
    then
        echo "${red}Failed, ${project} project has checkstyle issues!${noColor}"
        open ${projectDir}/${checkstylePath}
        exit $checkstyleStatus
    fi
    echo "${green}Succeeded, no android checkstyle issues found for ${project}${noColor}\n\n"
done
간단하게 설명하자면 여러 모듈에서 Android Lint, Checkstyle 검사를 할 수 있는 코드이다.
lintProjects 로 검사 대상 모듈들을 선언한다. 그럼 한 모듈씩 for 문 안에서 먼저 Android Lint 검사를 수행하고, 다음으로 Java Checkstyle 검사를 수행한다. 만약 검사를 통과하지 못하면, 바로 검사 결과가 기록된 html 파일을 브라우저로 열어준다. 그리고 commit 작업을 취소한다.
이렇게 입력한 pre-commit을 저장한 후에, chmod +x .git/hooks/pre-commit command 를 통해 pre-commit을 executable하게 만든다.
git hook pre-commit 자동 복사 & 적용 Task
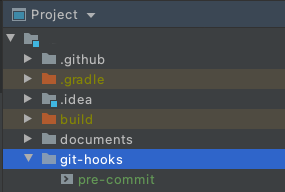
매번 위와 같이 git hook을 만들고, 적용하기는 어려울 것이다. 그래서 위 git hook을 아래 사진과 같이 rootDir/git-hooks 안에 저장해두었다.
그리고 rootDir/git-hooks 에 저장된 git hook을 local 환경 (rootDir/.git/hooks)에 자동 적용해주는 gradle task(아래 코드)를 rootProject/build.gradle 에 작성해두었다. 아래 코드는 이 글을 참고했다.
task copyGitHooks(type: Copy) {
    from("${rootDir}/git-hooks/") {
        include '**/*'
        rename '(.*)', '$1'
    }
    into "${rootDir}/.git/hooks"
}

task installGitHooks(type: Exec) {
    group 'git hooks'
    workingDir rootDir
    commandLine 'chmod'
    args '-R', '+x', '.git/hooks/'
    dependsOn copyGitHooks
}
rootDir 에서 ./gradlew installGitHooks command를 실행하면 프로젝트에 있는 git hook들이 local 환경에 적용된다.
현재는 commit 요청 시 Android Lint, CheckStyle java lint 검사를 자동으로 진행하는 git hook 뿐이다. 만약 새로 또 다른 git hook (ex. pre-push) 을 만들게 되면 rootDir/git-hooks 내부에 해당 파일을 넣고 remote 에 push 하면 된다. 그럼 팀원이 ./gradlew installGitHooks 을 실행하는 것 만으로 새로운 git hook을 공유받을 수 있다.
Test Commit
그럼 이제 Lint 검사가 제대로 작동하는지 확인해보자.
module-2 에 code convention을 지키지 않은 코드를 추가한 후 commit 해보았다.
-----------------Starting run android lint for module-1-----------------
Succeeded, no android lint issues found in module-1

-----------------Starting run android checkstyle for module-1-----------------
Succeeded, no android checkstyle issues found for module-1


-----------------Starting run android lint for module-2-----------------
Succeeded, no android lint issues found in module-2

-----------------Starting run android checkstyle for module-2-----------------

FAILURE: Build failed with an exception.

* What went wrong:
Execution failed for task ':module-2:checkstyle'.
> Checkstyle rule violations were found. See the report at: file:///Users/9geunu/LintTestProject/module-2/build/reports/checkstyle/checkstyle.html
  Checkstyle files with violations: 1
  Checkstyle violations by severity: [error:1]


* Try:
Run with --stacktrace option to get the stack trace. Run with --info or --debug option to get more log output. Run with --scan to get full insights.

* Get more help at https://help.gradle.org

BUILD FAILED in 2s
Failed, module-2 project has checkstyle issues!
module-2에 code convention을 지키지 않은 부분이 있다는 것이 확인되었다.
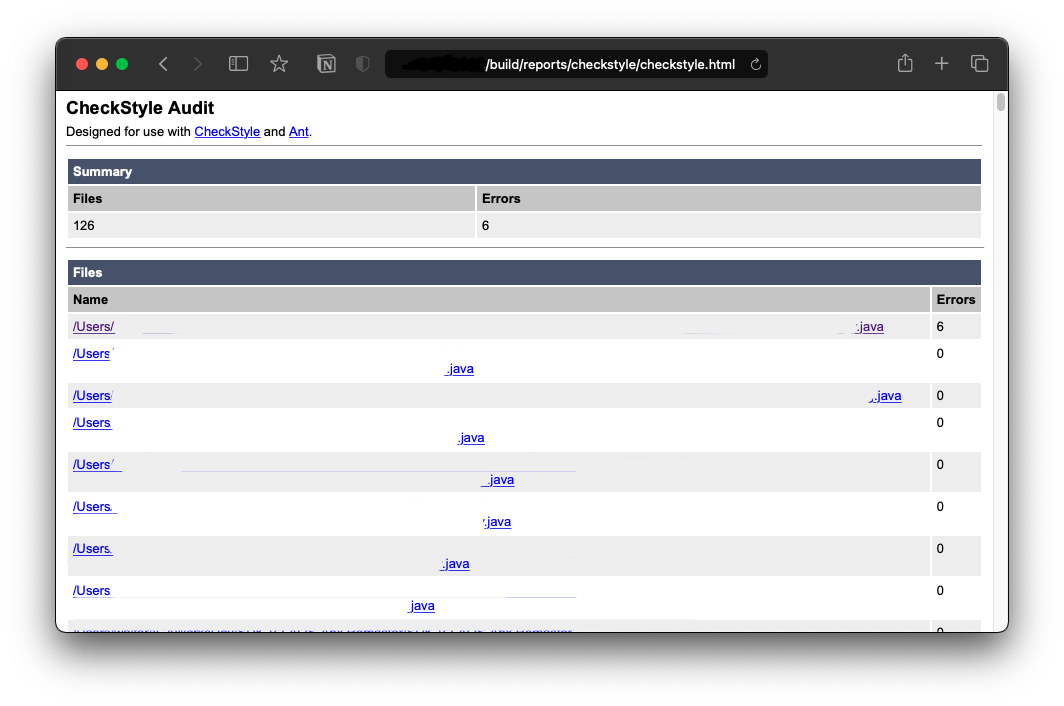
그리고 아래 사진과 같이, 바로 브라우저에서 report html이 열리는 것을 확인할 수 있다!
결론
이렇게 commit 할 때마다 모듈 별로 자동으로 Android Lint와 checkstyle java lint 가 실행되는 것을 알 수 있다. 앞으로 Lint 규칙을 지키지 않으면 commit이 되지 않는다!
로그를 보면 module-2/build/reports/checkstyle/checkstyle.html 와 같이 lint check report가 생성된 경로가 나타난다. 그리고 브라우저에 열린 report 를 참고해 어느 부분이 문제였는지 스스로 확인하고, 수정 후 다시 commit 해서 팀의 코드 컨벤션을 잘 지킬 수 있도록 하자.
참고