LifeCycle API 생명주기
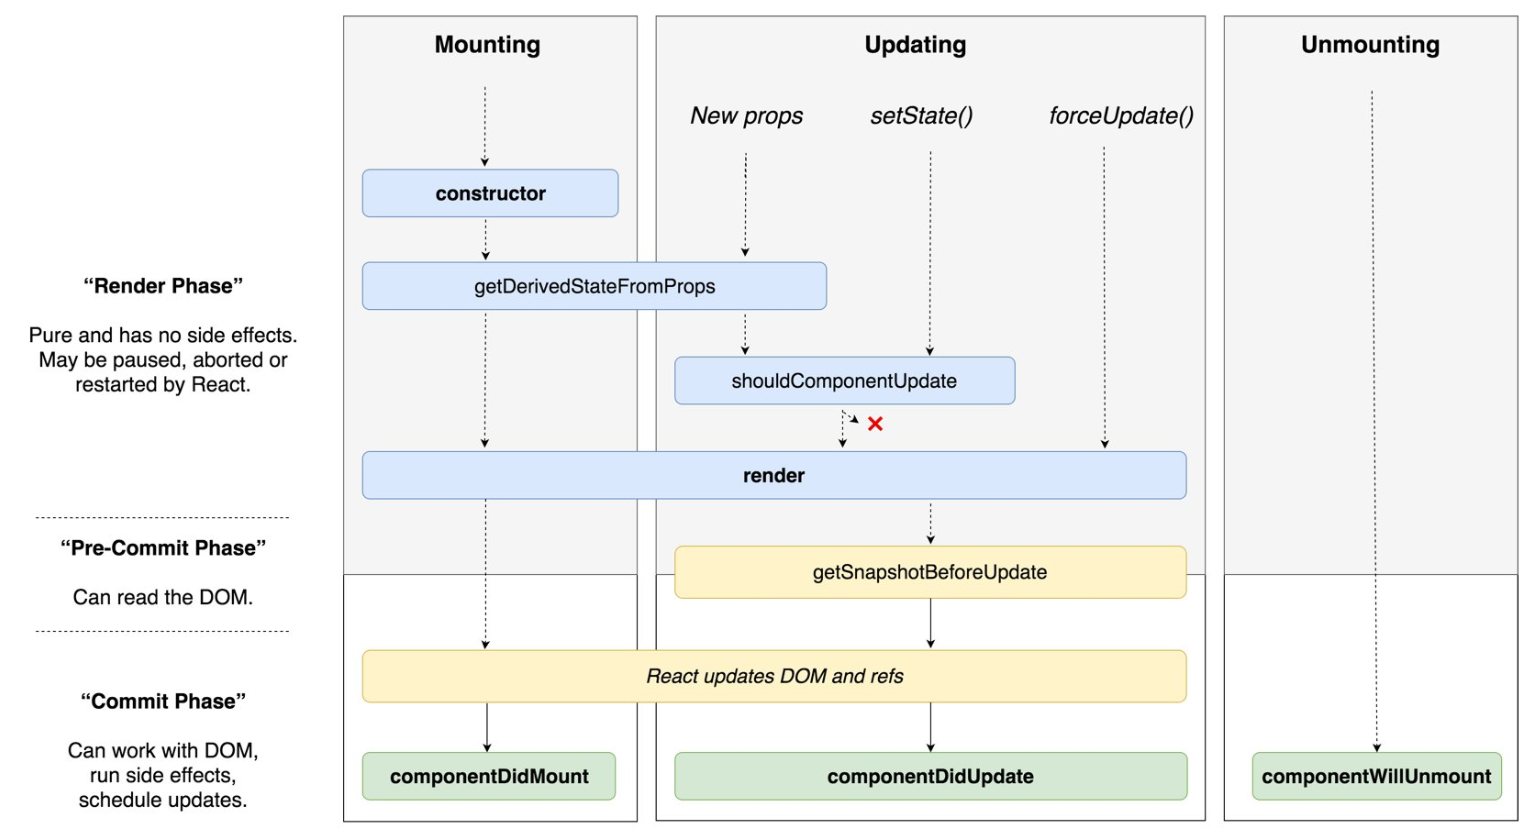
출처-LifeCycle
Mounting
component가 브라우저에 나타날 때
- constrctor : component가 만들어지는 과정에서
가장 먼저 실행되는 함수로 초기 state를 설정한다.import React from 'react'; class App extends React.Component { constructor(props) { super(props); this.state = { a:'1', } } render() { return( <div> <h1> hello world </h1> </div> ) } } export default App;아래와 같이 생략하여 사용할 수 있다.
import React, { Component } from 'react';
class App extends Component {
  state = {
    a: '1',
  }
  render() {
    return(
      <div>
        <h1> hello world </h1>
      </div>
    )
  }
}
export default App;
- getDerivedStateFromProps : 주로 props로 받은 값을 state로 동기화를 시켜주고 싶을 때 사용한다.
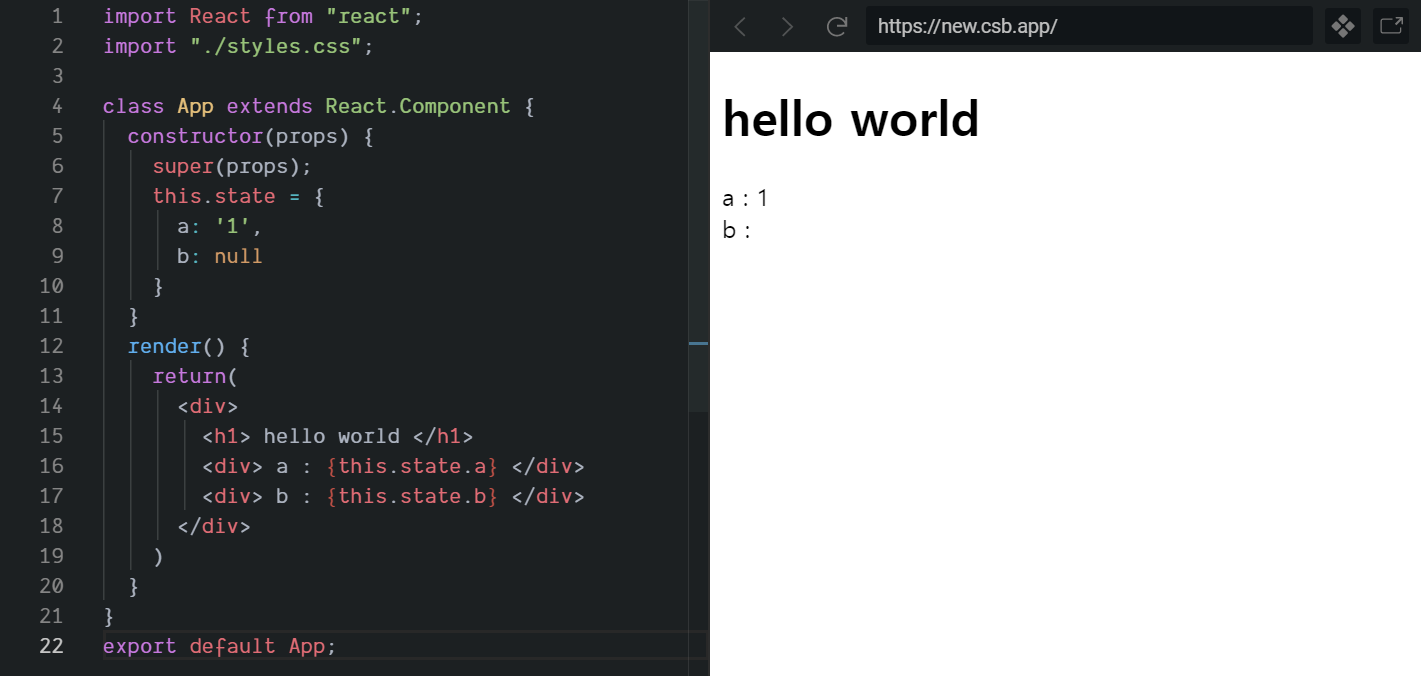
- render : class component에 필수로 있어야 한다. jsx를 사용하여 사용자가 작성한 엘리먼트들을 DOM 노드로 변환해준다. Boolean 값이나 null은 화면에 아무것도 표시되지 않는다.
import React from 'react';
class App extends React.Component {
  constructor(props) {
    super(props);
    this.state = {
      a:'1',
      b: null
    }
  }
  render() {
    return(
      <div>
        <h1> hello world </h1>
        <div> a : {this.state.a} </div>
        <div> b : {this.state.b} </div>
      </div>
    )
  }
}
export default App;
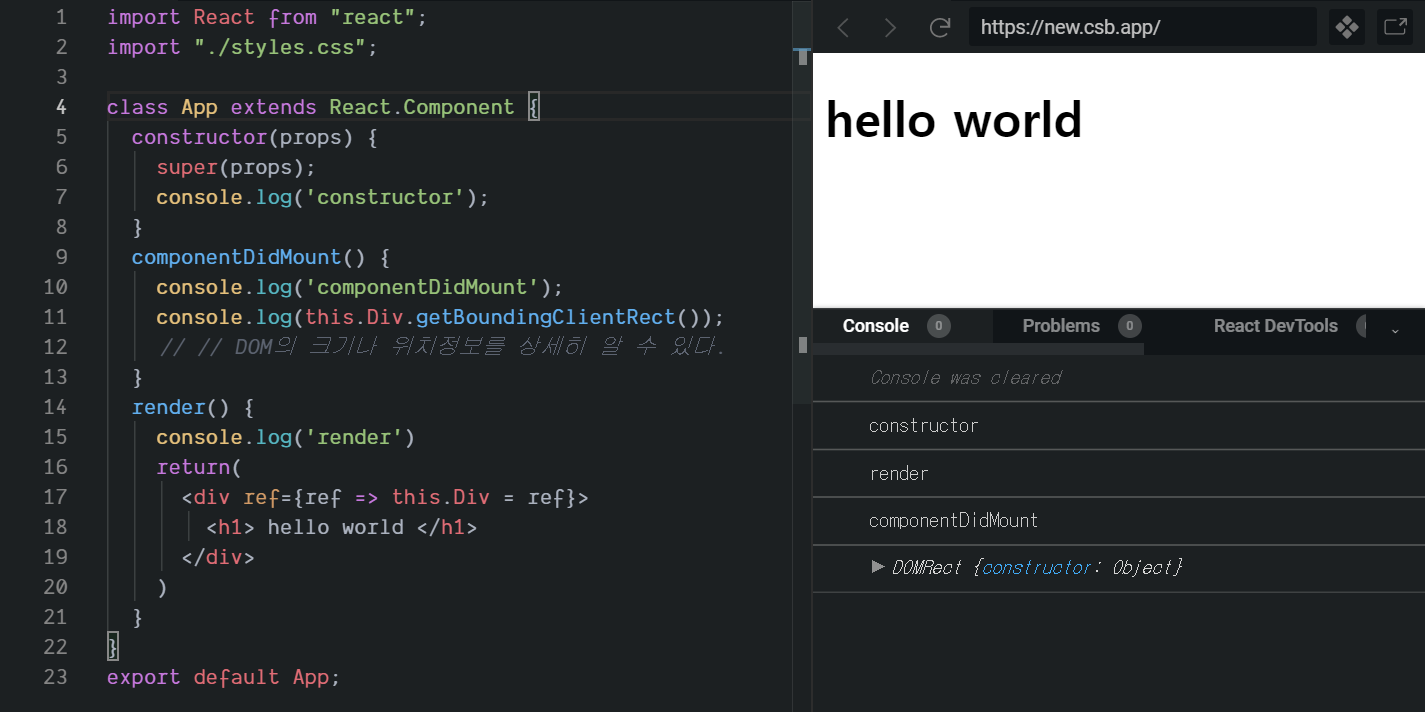
- componentDidMount: 브라우저에 나타나는 시점에 어떤 작업을 할 때 명시해 준다. render가 실행될 때 실행된다. 예를 들어, 컴포넌트에서 필요한 데이터를 요청하거나 DOM에 관련된 작업을 할 때 사용한다.
import React from "react";
class App extends React.Component {
  constructor(props) {
    super(props);
    console.log('constructor');
  }
  componentDidMount() { // 컴포넌트 첫 렌더링 후 호출, 비동기 요청을 이곳에서 많이 한다.
    console.log('componentDidMount');
    console.log(this.Div.getBoundingClientRect());
    // DOM의 크기나 위치정보를 상세히 알 수 있다.
  }
  render() {
    console.log('render');
    return(
      <div ref={ref => this.Div = ref}>
        <h1> hello world </h1>
      </div>
    )
  }
}
export default App;
- 콘솔을 확인해 보면 constroctor -> render -> componentDidMount 순서대로 실행된다. render가 실행된 후 가장 먼저 실행되는 함수이다.
Updating
component의 state나 props가 업데이트될 때
- shouldComponentUpdate : 컴포넌트가 업데이트가 되는 성능을 최적화 시키고 싶을 때 사용한다.
컴포넌트 업데이트 직전에 호출되며 Boolean 값으로 virtual DOM에 그릴지 말지 결정한다. shouldComponentUpdate를 따로 구현하지 않는다면 기본적으로 true로 설정된다.
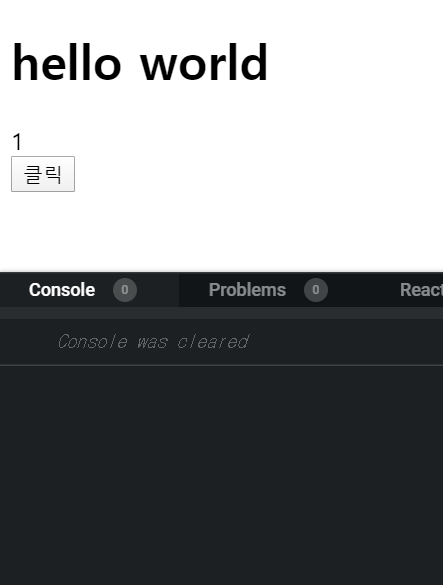
부모 컴포넌트가 렌더링이 되면 자식 컴포트들도 렌더링이 되기 때문에 성능을 최적화 시키고 싶을 때 사용되며 특정 조건에 따라 렌더링을 막아줄 수 있다.import React from 'react'; class App extends React.Component { constructor(props) { super(props); this.state = { count: 1, } } handleClick= () => { this.setState({ count: this.state.count+1 }); } shouldComponentUpdate(nextProps, nextState) { if(nextState.count === 5) return false; return true; } render() { return( <div> <h1> hello world </h1> <div>{this.state.count}</div> <button onClick={this.handleClick}>클릭</button> </div> ) } } export default App;
- 아래와 같이 nextState.count === 5 특정 조건에 false가 되었을 때 state의 값만 바뀌고 렌더링은 되지 않았다.
그다음 클릭을 했을 때 조건이 true가 되면서 5가 skip 되고 6이 렌더링 된다.
- componentDidUpdate : component가 업데이트되었을 때 호출되는 함수이다.
예를 들어, 이전의 state와 현재 state가 바뀌었을 때 어떠한 작업을 하고 싶을 때 사용한다.import React from 'react'; class App extends React.Component { constructor(props) { super(props); this.state = { count: 1, } } handleClick= () => { this.setState({ count: this.state.count+1 }) } componentDidUpdate(prevProps, prevState) { if(this.state.count !== prevState.count) { console.log('componentDidUpdate') } } render() { return( <div> <h1> hello world </h1> <div>{this.state.count}</div> <button onClick={this.handleClick}>클릭</button> </div> ) } } export default App;
- 아래와 같이 이전 state와 다음 state 값이 다를 때마다 componentDidUpdate 함수가 호출된다.

Unmounting
브라우저에서 사라질 때
- componenetWillUnmount : 컴포넌트가 사라지는 과정에서 호출되는 함수이다. 컴포넌트가 사라지기 직전, 비동기 요청 정리를 많이 한다.
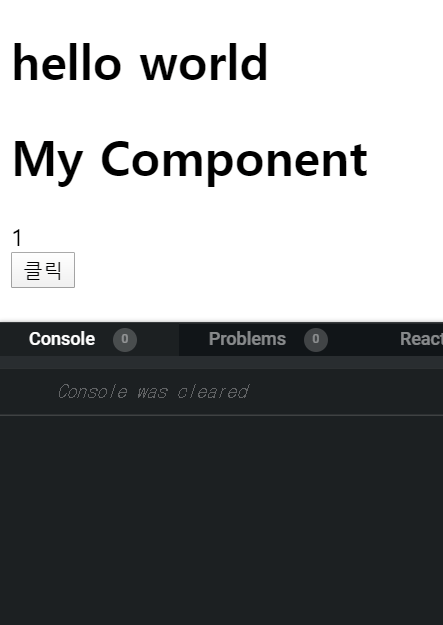
import React from 'react';
import MyComponent from "./MyComponent";
class App extends React.Component {
  state = {
    count: 1
  };
  handleClick = () => {
    this.setState({
      count: this.state.count + 1
    });
  };
  render() {
    return (
      <div>
        <h1> hello world </h1>
        {this.state.count < 2 && <MyComponent />}
        <div>{this.state.count}</div>
        <button onClick={this.handleClick}>클릭</button>
      </div>
    );
  }
}
export default App;
import React from "react"; class MyComponent extends React.Component { interval = null; componentDidMount() { this.interval = setInterval(() => { console.log("componentDidMount"); }, 1000); } componentWillUnmount() { console.log("componentWillUnmoun"); clearInterval(this.interval); } render() { return( <div> <h1> My Component </h1> </div> ) } } export default MyComponent;아래와 같이 component가 사라질 때
componentWillUnmount함수가 호출된다.
Hooks에서 LifeCyle 대체
useEffect
- useEffect 두 번째 인자로 빈 배열을 넣어 줬을 때 한 번만 호출된다.
import React, {useState, useEffect} from "react"; export default function App() { const [count, setCount] = useState(0); useEffect(()=>{ setTimeout(()=>{ setCount(count+1) },1000) },[]) // 빈배열일 때 한번만 호출된다. return ( <div className="App"> <h1>Hello World</h1> <div>{count}</div> </div> ); }- 배열 안에 인자를 넣어주면 인자가 변화될 때마다 호출된다.
import React, { useState, useEffect } from "react";
export default function App() {
  const [count, setCount] = useState(0);
  useEffect(()=>{
    const temp = setTimeout(()=>{
      setCount(count+1)
    },1000);
  },[count]); // 배열에 인자를 넣어주면 인자가 변할 때마다 호출된다.
  return (
    <div className="App">
      <h1>Hello World</h1>
      <div>{count}</div>
    </div>
  );
}
- return을 해주면 함수 호출을 정리한다.
import React, { useState, useEffect } from "react";
export default function App() {
  const [count, setCount] = useState(0);
  useEffect(()=>{
    const temp = setTimeout(()=>{
      setCount(count+1);
    },1000);
    if(count === 5){
      return clearInterval(temp); // 정리
    }
  },[count])
  return (
    <div className="App">
      <h1>Hello World</h1>
      <div>{count}</div>
    </div>
  );
}
개발 노트