React Natvie) android에서 fcm notification icon 설정하기
firebase messaging 문서를 따라 fcm 연동을 성공적으로 마쳤다면 android에서는 별도의 추가 설정 없이 push notification을 수신할 수 있게 되었을 것이다. 다만 이상태로 push message를 수신하면 notification에 icon이 이상하게 표시되고 있을 확률이 높다.
ios환경에서는 notification icon을 자동으로 app icon으로 사용해주지만, android에서는 그렇지 않기 때문이다. 그 이유는 android의 notification icon 정책에 있다. android는 app icon과는 달리 notification icon의 색상을 단색으로 제한하고 있기 때문이다. 따라서 이런 정책에 따라 별도의 notification icon을 설정해주어야한다. 백문이 불여일견 일단 설정을 해보자
iocn 만들기
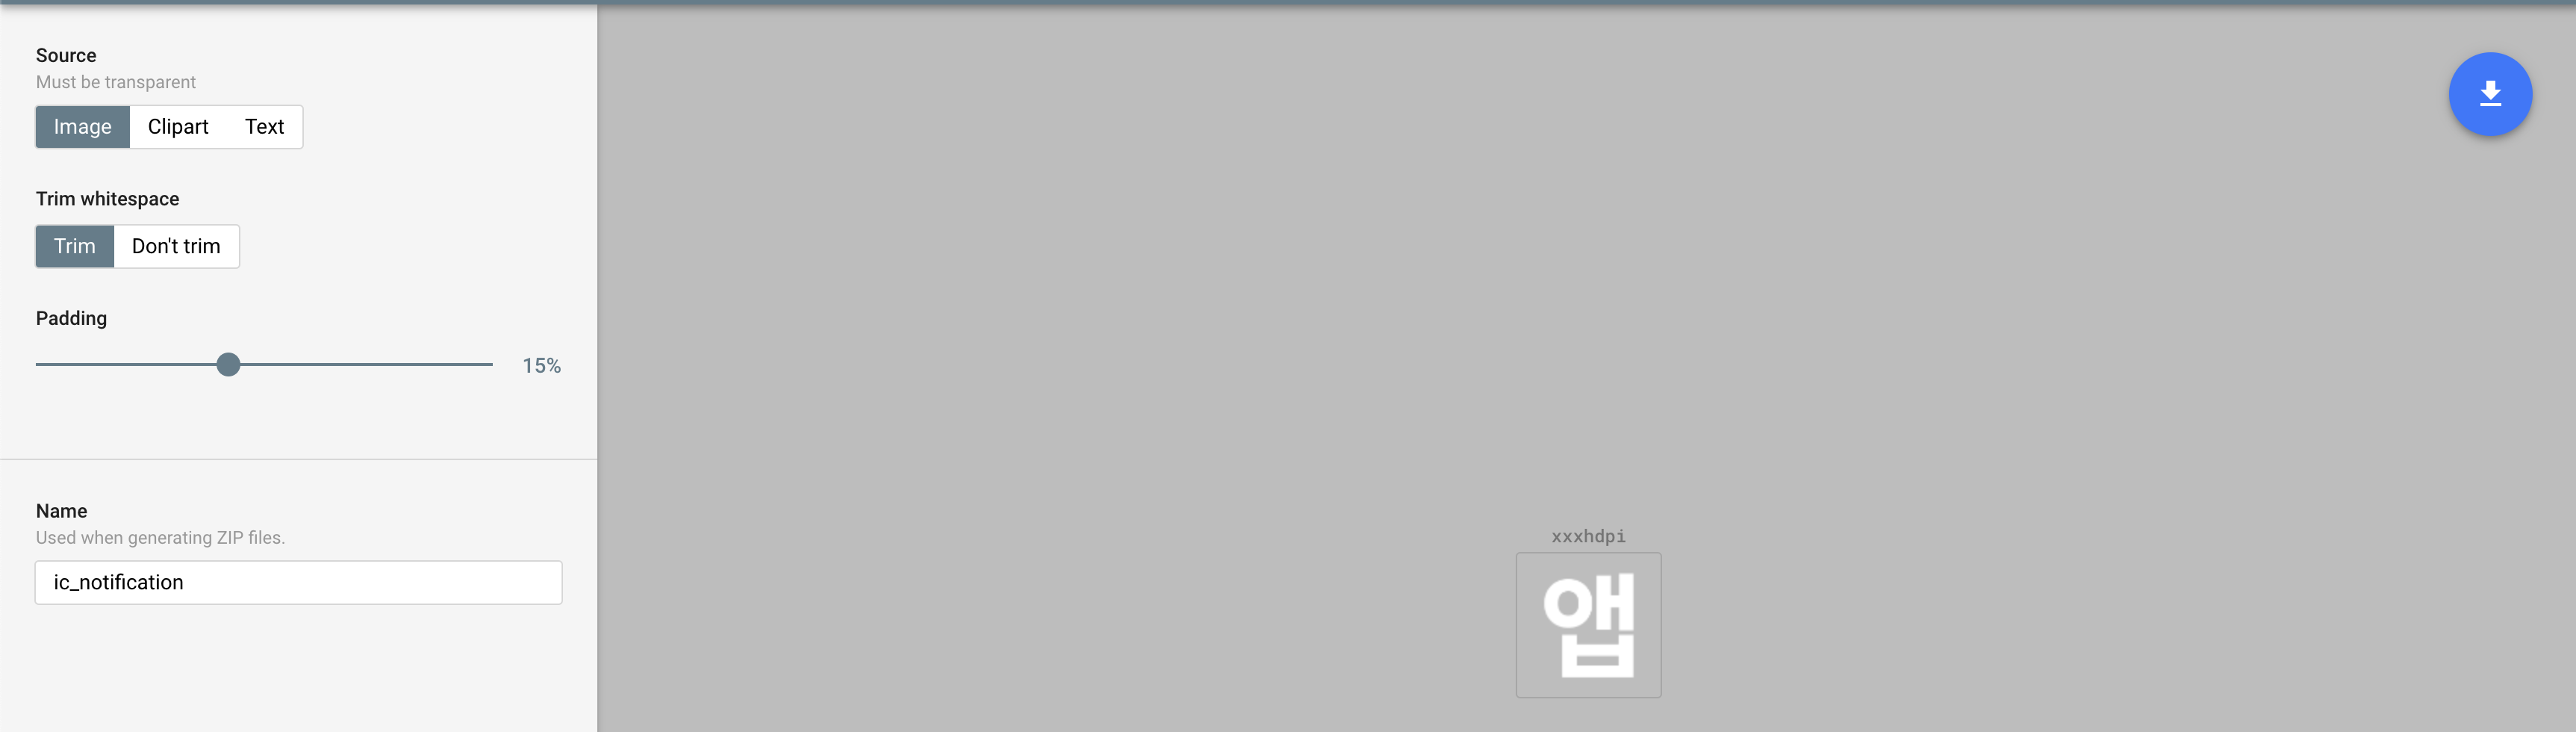
일단 사용할 icon을 만들어야한다. android notification icon generator 사이트에 접속해 원하는 image를 업로드하고 세부 설정을 마친 후 우측 상단 버튼을 눌러 icon을 다운로드 한다. 여기서 주의할 점은 반드시 여백이 있어야한다는 점이다. notification icon은 단색밖에 지원하지 않기 떼문에 만약 기존 app icon과 같이 하나의 지면에 색상만 다르게 해서 업로드했다가는 흰색의 사각형밖에 보이지 않을 것이다.
android asset에 추가하기
다운로드 결과물 중에 drawable-xxxhdpi 폴더 안에 있는 파일을 root/android/app/src/main/res/drawable 폴더에 붙여넣기 한다. 이때 파일 이름은 중요하지 않지만 나는 ic_notification으로 설정했다.
fcm icon 설정하기
root/android/app/src/main/AndroidMenifest.xml 파일을 열고 application 안쪽에 아래와같이 meta-data를 추가한다.
<application ...>
<meta-data android:name="com.google.firebase.messaging.default_notification_icon"
android:resource="@drawable/ic_notification" /> //<- add here
<activity ...>
...
</activity>
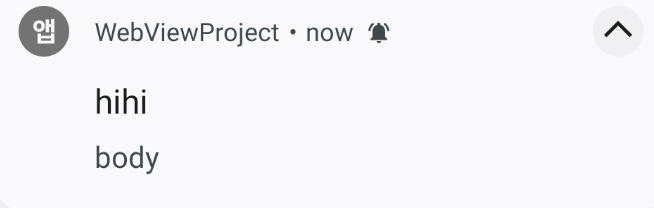
</application>그러면 이렇게 background에서 메시지가 도착했을 때 앱에서 자동으로 표시해주는 notification에 ic_notification이 잘 적용된 것을 볼 수 있다.
색상 변경하기
현재는 아이콘이 그레이 색상이 기본 설정되어 있다. 그리고 이 색상 또한 커스텀이 가능하다.
일단 android/app/src/main/res/values 폴더에 colors.xml 파일을 만들고 그 안쪽에 아래 코드를 추가하여 원하는 색상을 지정해준다.
<?xml version="1.0" encoding="utf-8"?>
<resources>
    <color name="colorPrimary">#FFE0B2</color>
</resources>
그러고 나서 AndroidMenifest.xml 파일에 meta-data tag를 하나 더 추가하면 된다.
<application ...>
        <meta-data  android:name="com.google.firebase.messaging.default_notification_icon"
                    android:resource="@drawable/ic_notification" />
		<meta-data  android:name="com.google.firebase.messaging.default_notification_color"
                   android:resource="@color/colorPrimary"
                   tools:replace="android:resource"/> //<- add here
      <activity ...>
		...
      </activity>
    </application>
이 과정에서 tools를 찾지 못하겠다는 에러가 발생할 수 있는데, 그럴경우 AndroidMenifest.xml 파일 최상단 menifest 태그에 tools를 추가하여 아래와같이 만들어주면 된다.
<manifest xmlns:android="http://schemas.android.com/apk/res/android" xmlns:tools="http://schemas.android.com/tools">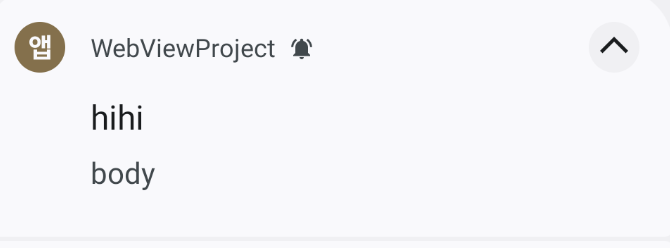
foreground 알림 커스텀하기
지금까지 설정한 것은 백그라운드에서 push message를 수신했을 경우 기본설정에 의해 표시되는 알림을 커스텀하는 과정이었다. 이제는 notifee를 이용해 표시하는 foreground 알림을 커스텀해주어야하는데, 아까 만들어주었던 onDisplayNotification 함수에서 smallIcon과 color만 추가해주면 된다.
 const onDisplayNotification = async ({
    title = '',
    body = '',
  }: {
    title?: string;
    body?: string;
  }) => {
    const channelId = await notifee.createChannel({
      id: 'channel-id',
      name: 'channel-name',
    });

    await notifee.displayNotification({
      title,
      body,
      android: {
        channelId,
        smallIcon: 'ic_notification',  //<-add here
        color: '#FFE0B2',  //<-add here
      },
    });
  };