Android MDC 104 : Advanced Components
MDC 104에서는 Back Drop Menu를 만들고 애니메이션을 넣는 방법에 대해 주로 다룬다.
1. BackDrop Menu XML
BackDrop Menu XML파일을 살펴보자
<FrameLayout xmlns:android="http://schemas.android.com/apk/res/android"
xmlns:app="http://schemas.android.com/apk/res-auto"
xmlns:tools="http://schemas.android.com/tools"
android:layout_width="match_parent"
android:layout_height="match_parent"
tools:context=".ProductGridFragment">
<LinearLayout
style="@style/Widget.Shrine.Backdrop"
android:layout_width="match_parent"
android:layout_height="match_parent"
android:gravity="center_horizontal"
android:orientation="vertical"
android:paddingTop="100dp"
android:paddingBottom="0dp">
<include layout="@layout/shr_backdrop"/>
</LinearLayout>
<com.google.android.material.appbar.AppBarLayout
android:layout_width="match_parent"
android:layout_height="wrap_content"
app:elevation="0dp">
<androidx.appcompat.widget.Toolbar
android:id="@+id/app_bar"
style="@style/Widget.Shrine.Toolbar"
android:layout_width="match_parent"
android:layout_height="?attr/actionBarSize"
android:paddingStart="12dp"
android:paddingLeft="12dp"
android:paddingEnd="12dp"
android:paddingRight="12dp"
app:contentInsetStart="0dp"
app:title="@string/shr_app_name"
app:navigationIcon="@drawable/shr_branded_menu"/>
</com.google.android.material.appbar.AppBarLayout>
<androidx.core.widget.NestedScrollView
android:id="@+id/product_grid"
android:layout_width="match_parent"
android:layout_height="match_parent"
android:layout_marginTop="56dp"
android:background="@color/productGridBackgroundColor"
app:layout_behavior="@string/appbar_scrolling_view_behavior"
android:elevation="8dp">
<androidx.recyclerview.widget.RecyclerView
android:id="@+id/recycler_view"
android:layout_width="match_parent"
android:layout_height="match_parent"/>
</androidx.core.widget.NestedScrollView>
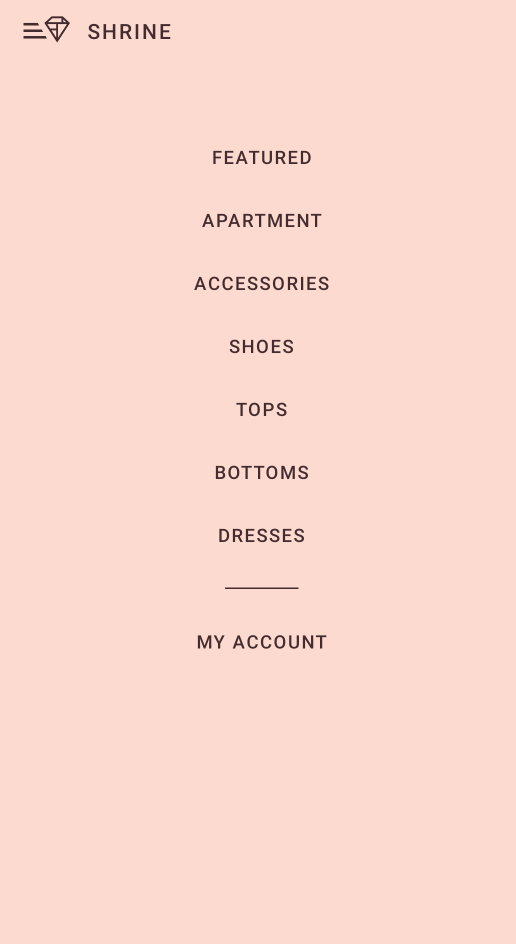
</FrameLayout>BackDrop Menu는 첫번째 LinearLayout부분이다.
<include layout="@layout/shr_backdrop"/>BackDrop Menu에서 주의 깊게 살펴볼 부분은 위 부분이다. shr_backdrop은 backdrop menu에 포함될 버튼으로 include tag를 통해 BackDrop menu에 포함시킬 수 있다
이렇게 만든 BackDrop Menu는 아래와 같다.
2. BackDrop Menu 애니메이션
다음으로는 BackDrop Menu에 애니메이션을 주는 방법을 살펴보자. 그런데 여기에 한 가지 반전이 있다. 바로 BackDrop Menu에 애니메이션을 적용한게 아니라는 것이다...
이번 코드랩에서는 BackDrop Menu를 보이도록 하기 위해 RecyclerView를 아래로 이동시킨다. 즉 BackDrop Menu는 RecyclerView 뒤에 항상 존재하고 AppBar Navigation icon을 누르면 RecyclerView가 내려가면서 BackDrop이 보이게 되는 형태다.
Navigation Icon을 클릭시 동작을 등록하는 코드는 아래와 같다
view.app_bar.setNavigationOnClickListener(NavigationIconClickListener(
               activity!!,
               view.product_grid,
               AccelerateDecelerateInterpolator(),
           ContextCompat.getDrawable(context!!, R.drawable.shr_branded_menu),
           ContextCompat.getDrawable(context!!, R.drawable.shr_close_menu)))
인자로 총 5개 받는데 애니메이션에 해당하는 인자는 AccerlateDecelerateInterpolator()이다. 이는 시작시 가속했다가 끝지점에 도달할 쯤 감속하는 애니메이션 동작이다.
이 부분을 BounceInterpolater()로 바꾸면 BackDrop Menu가 통통 튀는 모습을 보인다.
애니메이션의 세세한 동작이 담긴 부분은 NavigationIconClickListener인데 이 클래스는 코드랩 측에서 자체적으로 만든 클래스이다.
View.OnClickListener를 상속하기 때문에 onClick함수를 살펴보자
override fun onClick(view: View) {
       backdropShown = !backdropShown

       // Cancel the existing animations
       animatorSet.removeAllListeners()
       animatorSet.end()
       animatorSet.cancel()

       updateIcon(view)

       val translateY = height - context.resources.getDimensionPixelSize(R.dimen.shr_product_grid_reveal_height)

       val animator = ObjectAnimator.ofFloat(sheet, "translationY", (if (backdropShown) translateY else 0).toFloat())
       animator.duration = 500
       if (interpolator != null) {
           animator.interpolator = interpolator
       }
       animatorSet.play(animator)
       animator.start()
   }
animation 동작은 아래와 같이 정래해볼 수 있다
-
BackDropMenu가 보이고 있을 때
현재 위치에서 0에 해당하는 위치까지 500ms에 걸쳐 이동한다 -
BackDrop Menu가 안보일 때
현재 위치에서 R.dimen.shr_product_grid_reveal_height의 크기 만큼만 RecyclerView가 보이도록 500ms에 걸쳐 recyclerView를 이동시킨다.
이렇게 RecyclerView가 움직임에 따라 뒤에 가려졌던 Backdrop Menu가 보인다.
[참고자료]