
SEO
SEO란 웹사이트와 웹페이지를 검색엔진이 쉽게 발견(디스커버리)하고, 읽어가서(크롤링), 색인하고(인덱싱), 상위 노출(랭킹)시켜 자연 유입되는 트래픽의 양과 질을 높일 수 있도록 관련 검색 알고리즘의 특성을 고려해서 웹사이트의 구조나 콘텐츠를 개선하는 일련의 작업을 말합니다.
메타데이터
SEO 중 오픈그래프, 트위터 카드등을 통해서 검색엔진에 최적화될 수 있는 메타정보를 주는 것을 진행해볼 것입니다.
홈페이지의 주소를 공유하고 나면 웹페이지에 대한 설명이나 썸네일이 추가되는 것을 확인할 수 있었을 것입니다.
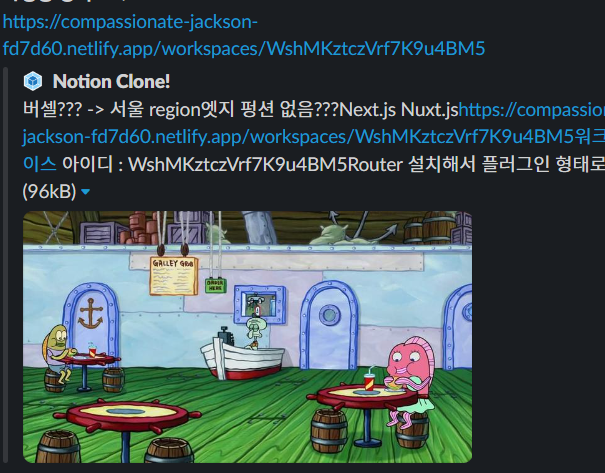
이렇게 제공하는 메타데이터는 검색엔진을 최적화할수 있습니다. 대표적으로 오픈그래프와 트위터카드가 있습니다.
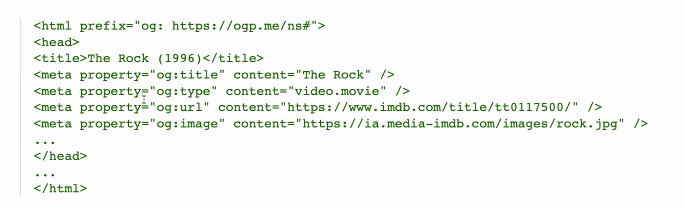
오픈그래프로 메타데이터를 제공하는 경우 아래와 같이 제공할 수 있습니다. 이렇게 오픈그래프 포맷으로 제공하는 메타데이터가 많습니다.
SPA의 하위페이지 접근
새로고침을 하고 나면 루트경로로 들어가서 각각의 하위페이지로 접근을 하는 것은 가능합니다. 그런데 싱글페이지 어플리케이션의 경우 메인 페이지가 아닌 하위 페이지로 바로 접근하는 것은 안됩니다.
싱글페이지 어플리케이션의 진입점은 루트경로의 index.html이기 때문입니다.
// function> index.ts
import * as express from 'express'

const app = express()
app.use(express.json())
app.use(cors())
app.use('/todo', todo)

// functions> todo > todo.ts

const router = express.Router()
router.get('/',() => {})
지난 번 firebase를 통해 만든 프로젝트의 경우 위와 같이 express의 use메소드를 통해 각각의 페이지를 라우팅하고 있습니다.
이렇게 router를 통해 라우터의 어떤 주소를 처리하는 명령들(api)를 만들었습니다. 그런데 api없이 진행을 할수도 있습니다. 대표적으로 페이지(HTML파일)처리를 하는 내용을 만들어볼예정입니다.
- 페이지를 만든다는 것은 결국에 HTML코드를 만든다는 것으로, html파일을 만들어 서버단에서 프론트엔드단에게 넘겨주는 방식입니다.
- 즉, 서버측(서버리스함수)에서 처리가 되어야합니다.
- 하위페이지로 접근 시 메인페이지로 이동하는 처리를 할 것입니다.
- netlify의 경우 아래와 같이
netlify.toml에서 처리를 할 수 있습니다.
netlify.toml
# [[redirects]]
#   from = '/*'
#   to = '/index.html'
#   status = 200
프로젝트 시작
🐥살펴보기
그동안의 프로젝트를 살펴보면 netlify cli라는 패키지를 설치한 후 넷니파이의 서버리스 함수를 netlify > functions > test.ts에 정의를 해놓았습니다.
import { Handler } from '@netlify/functions'

const handler: Handler = async (event, context) => {
  console.log('event, context:', event, context)
  return {
    statusCode: 200,
    body: JSON.stringify({
      heropy: 'Heropy?!'
    })
  }
}
export { handler }
이렇게 netlify cli를 설치해서 로컬에서 테스트를 한 후 테스트가 완료되는 경우 배포를 하는 것입니다.
package.json
  "scripts": {
    "dev": "vite",
    "build": "vue-tsc --noEmit && vite build",
    "preview": "vite preview",
    "netlify": "netlify dev"
  },
npm run netlify를 통해 netlify dev 서버를 열 수 있도록 해놓았습니다. 이러한 netlify dev가 동작할 수 있는 기본 옵션은 netlify.toml에 정의가 되어 있습니다.
netlify.toml
[dev]
  targetPort = 2999 # 연결할 프로젝트 개발 서버의 포트를 지정합니다.
  port = 3000 # 출력할 Netlify 서버의 포트를 지정합니다.

[[redirects]]
  from = "/*"
  to = "/index.html" ✅
  status = 200
vite.config.ts
  server: {
    port: 2999
},- 넷니파이서버는 3000에서 돌아서 2999에서 노는 애를 땡겨가서 마치 자기가 도는 것처럼 움직입니다.
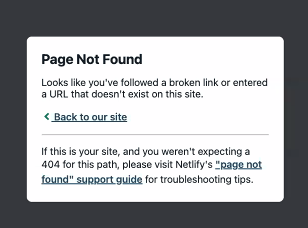
- 새로고침을 해도 page NOT Found가 뜨게 하려면
to = "/index.html"를 설정해주면 됩니다. (히스토리모드 일 때)
배포하기
넷니파이로 접근을 해 배포를 해봅니다.
일반 컴퓨터서버와 호스팅 서버는 조금 다릅니다
- 컴퓨팅 서버는 쉽게말해 우리 노트북을 생각하면 됩니다. 계속해서 뭘 돌릴수 있습니다(헤로쿠)
- 호스팅서버는 폴더로 생각하면 됩니다. 파일을 저장만 하는 것입니다.(넷니파이, 버셀)
배포 후 하위 파일로 접근을 하면 not found 대신 메인페이지로 이동하는 것을 확인할 수 있습니다.
🐥서버리스 함수
1. intro
store > workspace.ts의 가장 아래에 위치한 request함수를 확인해보면 이 reuest함수는 오픈되어서는 안되는 중요한 정보가 들어있습니다.
store > workspace.ts
async function request(options: RequestOptions) {
  const { id = '', method, body } = options
  const res = await fetch(`https://asia-northeast3-heropy-api.cloudfunctions.net/api/notion/workspaces/${id}`, {
    method,
    headers: {
      'content-type': 'application/json',
      'apikey': 'apikey블라블라', ✅
      'username': 'USERNAME블라블라' ✅
    },
    body: JSON.stringify(body)
  })
  return res.json()
}
이 정보를 숨기는 방법은 뒷단에서 가능합니다. 이부분을 functions폴더에 새로운 파일을 만들어 대체해보도록 하겠습니다.(workspace.ts)
2. 서버리스 함수 만들기
functions > workspace.ts 새로운 파일을 만듭니다.
여기서 만든 함수를 통해 서버로 api를 요청한 후 프론트엔드에서는 그 정보를 받아쓰면 됩니다.
import { Handler } from '@netlify/functions'

const handler: Handler = async (event, context) => {
  await fetch(`https://asia-northeast3-heropy-api.cloudfunctions.net/api/notion/workspaces/${id}`, {
    method,
    headers: {
      'content-type': 'application/json',
      'apikey': 'FcKdtJs202204',
      'username': 'ParkYoungWoong'
    },
    body: JSON.stringify(body)
  })
}
export { handler }
- ※ Handler라는 이름은 넷니파이에서 요구하는 이름입니다.
- workspace.ts파일의 fetch 함수 부분을 복사해와 붙여넣습니다.
- fetch는 node.js에서 작동하는 함수입니다. 따라서 fetch는 브라우저에서 제공하는 함수이기 때문에 이를 위한 패키지를 설치해야합니다.
- 우리는 axios를 사용하도록 하겠습니다.
- netlify폴더는 루트 경로에 있는 package.json에도 영향을 받습니다.
- 따라서 이 루트 경로에 있는 package.json에 axios를 설치하시면 됩니다.
(넷니파이는 호스팅 서버이며 파이어베이스는 호스팅서버가 아니기에 구조가 다릅니다)
axios설치
$ npm i axiosfunctions > workspace.ts
import { Handler } from '@netlify/functions'
import axios from 'axios' //1. axios를 가져옵니다.

const handler: Handler = async event => {
  //요청 body에서 id, method, data를 꺼내옵니다.
  //event.body는 문자임으로 json.parse를 해줘야합니다.
  const { id, method, data } = JSON.parse(event.body as string) //event.body에서 꺼냅니다(POST에서 가능)
  const { data : returnValue } = await axios({
    url: `https://asia-northeast3-heropy-api.cloudfunctions.net/api/notion/workspaces/${id}`,
    method,
    headers: {
      'content-type': 'application/json',
      'apikey': 'apikey블라블라',
      'username': '0seo8'
    },
    data
  })
  return {
   	statusCode: 200,
    body: JSON.stringify(returnValue)
  }
}
export { handler }- axios를 가져와 fetch함수를 axios함수로 변환해줍니다.
- url위치 수정
body: JSON.stringify(body)를data: body로 수정해줍니다.- body도 data라는 이름으로 쓰면
data로 생략할 수 있습니다. - 이제 어떤 요청을 하는지에 대한 method부분과 data만 채워넣으면 됩니다.
- 이러한 내용은 event 매개변수에 들어있습니다.
const {id, method, data} = event.bodyevent.body는 문자이기 때문에JSON.parse로 객체형태로 바꿔옵니다.- 반환할 데이터 값을 return 부분에 작성을 해줍니다.
- axios호출 결과로 객체구조분해해 가져올 data라는 값이 이미 사용되고 있는 변수이므로 returnValue로 수정해 사용을 하겠습니다.
3. 로컬 함수 수정
store > workspace.ts
async function request(options: RequestOptions) {
  const { id = '', method, body } = options

  const res = await fetch('/.netlify/functions/workspace', { //1. 주소부분을 바꿔줍니다.
    method: 'POST', //4.
    //3. 서버로 옮겼기 떄문에 header속성은 더이상 필요하지 않습니다.
    body: JSON.stringify({ //2.
    	id,
      	method,
        data: body
    })
  })
  return res.json()
}- functions내부 workspace로 요청이 들어갈 수 있도록
'도메인/.netlify/functions/workspace'로 수정을 해줍니다.- 도메인을 생략하면 내 사이트로 들어가게 됩니다.
- 서버에서 body뿐만 아니라 id와 method부분도 필요하기 때문에 요청하는 부분에
body: JSON.stringfy(body)를body: JSON.stringfy({id, method, .data: body})로 수정해줍니다.- 서버에서 data라는 이름으로 사용하기로 했으니 data:body로 보내줍니다.
- 이제 headers는 서버로 다 옮겨 필요가 없으니 날려줍니다.
- 서버함수로 요청을 보내는 것이기 때문에
method: 'POST'로 설정해줍니다.- ⭐실제로 DELETE를 요청하더라도 서버함수에 요청을 해야하기 때문에 POST로 설정을 해주고 실제로 요청하는 method를 담아 보내줍니다.
4. 환경변수 (dotenv)
1차적으로 프론트엔드에서 코드를 날려 감췄지만 깃허브를 공개저장소에 올리는 경우 대놓고 공개하는 것과 같습니다. 그렇기 때문에 백엔드 코드도 환경변수로 수정할 수 있습니다.
따라서 서버가 동작하는 환경에 숨기도록 하겠습니다.
4-1 설치 및 세팅
$ npm i dotenv루트경로에 .env파일을 만들어 중요정보를 잘라내어 붙여줍니다.
.env
APIKEY=FcKdtJs202204
USERNAME=ParkYoungWoong
.gitignore에 env파일 추가를 해 깃저장소에 올라가지 않도록 해줍니다.
4-2 백앤드 코드에 env 설정
import { Handler } from '@netlify/functions'
import axios from 'axios'

const { APIKEY , USERNAME} = process.env //APIKEY, USERNAME를 가져옵니다.

const handler: Handler = async (event,) => {
  const { id, method, data } = JSON.parse(event.body as string)
  const { data: returnValue } = await axios({
    url: `https://asia-northeast3-heropy-api.cloudfunctions.net/api/notion/workspaces/${id}`,
    method,
    headers: {
      'content-type': 'application/json',
      'apikey': APIKEY as string,
      'username': USERNAME as string
    },
    data
  })
  return {
    statusCode: 200,
    body: JSON.stringify(returnValue)
  }
}
export { handler }
4-3 넷니파이 서버에 환경변수 설정해주기
넷니파이 = build & deploy- environmonet variables에 환경변수를 넣어줍니다.
이제 깃허브에 올려 자동배포가 되도록 한 후 결과를 확인해보면 정상적으로 배포가 된 것을 확인할 수 있습니다.
🐥서버사이드 렌더링
- user/브라우저가 웹사이트에 접근을 하게 되면 호스팅 서버에서 HTML를 기준으로 + 알파 주게 됩니다. 그러면 사용자가 브라우저에서 그 파일들을 화면에 렌더링하게 됩니다.
- 사용자/브라우저는 렌더링을 하고 난 후 더 필요한 정보를 서버에 요청을 하게 됩니다.(대표적으로 API으로 요청과 응답이 발생합니다.)
- 환경에 숨긴 apikey와 username을 웹서버에서 다루고 사용자/브라우저는 결과만 받아갑니다.
- 넷니파이의 경우 호스팅서버와 웹서버가 묶여있기 떄문에 프론트엔드 측에서는 별다른 username이나 api키를 주지 않아도 됩니다. 만약 그렇지 않으면 서버측에서 cors를 도입해 제한해줘야합니다.
- 이제 렌더링이 될때 검색엔진의 봇이라는 것이 호스팅 서버에 접근을 해 meta정보만 빼갑니다.
- 크롤링, 스크래핑의 경우 봇이 자신의 컴퓨팅 환경에서 코드를 열어 열은곳데서 띄우고 띄우고 하면서 특정 텍스트만 뽑아내라고 명령을 받는 것입니다.
- meta정보를 빼가는 대상은 index,html입니다.
- 그런데 뽑아갈떄 동적으로 바꿔줄 수 있지 않습니다.
- 이 부분이 바로 SPA방식이 프론트엔드의 단점으로 꼽힙니다.
- 원리만 가지고는 사실상 불가능합니다.
- 그래서 필요한 것이 서버사이드 렌더링입니다.
- 봇이 접근하면 meta정보만 가진상태에서 튕기고 사용자는 호스팅으로 연결해주도록 만들것입니다.
1. render.ts
function 내부에 render.ts라는 파일을 만들어줍니다.
render.ts
import { Handler } from '@netlify/functions'

const handler: Handler = async event => {

  return {
    statusCode: 200,
    body: JSON.stringify({})
  }
2. 오픈그래프 설정
index.html에 meta정보를 아래와 같이 설정을 해줍니다.
<meta property="og:type" content="website" />
<meta property="og:site_name" content="Notion Clone!" />
<meta property="og:title" content="Heropy's Notion!!" />
<meta property="og:description" content="내 노션은 멋있어!" />
<meta property="og:image" content="???" />
<meta property="og:url" content="https://charming-moonbeam-67283c.netlify.app/workspaces" />
url주소의 경우 "https://charming-moonbeam-67283c.netlify.app/workspaces/pn7PZsRX5shYXKX1Qxc6"과 같이 동적으로 변경이 되어야하지만 일단 url만 적어놓습니다.
3. dist폴더 확인
$ npm run buildbuild된 결과를 render라는 서버함수가 응답해줄 수 있도록 만들어보도록 하겠습니다. build후 만들어지는 index.html파일을 모두 render함수로 옮깁니다
4. render.ts
render.ts
import { Handler } from '@netlify/functions'
import axios from 'axios'

const handler: Handler = async event => {

  return {
    statusCode: 200,
    headers: {
      'content-type': 'text/html; charset=utf-8'
    },
    body: ` 이부분에 붙여넣습니다. `
}- header를 만들어 줍니다.
- html을 반환하는 것이기 때문에
'content-type': 'text/html; charset=utf-8'를 넣어둡니다
- html을 반환하는 것이기 때문에
- body 부분에 복사해온 내용을 붙여넣습니다.
http://localhost:3000/.netlify/functions/render이주소로 접근을 해줍니다.- 이것이 바로 서버사이드 렌더링입니다.이렇게 서버에서 렌더링을 해주면 메타정보를 동적으로 바꿀 수 있습니다.
5. netlify toml
[dev]
  targetPort = 2999 # 연결할 프로젝트 개발 서버의 포트를 지정합니다.
  port = 3000 # 출력할 Netlify 서버의 포트를 지정합니다.

[[redirects]]
  from = '/*'
  to = '/.netlify/functions/render'
  status = 200
index.html파일로 이동시켰던 코드to = '/index.html를 to = '/.netlify/functions/render'로 변경을 해줍니다.
6. 사용되는 페이지에 따라 메타정보가 달라지게 설정
하위 페이지로 접근 했을 때마다 렌더링되는 정보가 달라질 수 있도록 설정을 해보도록 하겠습니다.
render.ts
const handler: Handler = async event => {
	conosle.log(event.path) // output: /workspaces/동적아이디
}
event.path 중 동적으로 렌더링되는 아이디를 가지고 workspaces.ts에 요청을 해 페이지에 맞는 메타정보를 가져와 index.html에 뿌려줄 수 있도록 설정을 해야합니다.
6-1 이벤트 path에서 아이디 값 추출
render.ts
const handler: Handler = async event => {
  conosle.log(event.path) // output: /workspaces/동적아이디
  const id =event.path.split('/').filter(p => p).reverse()[0]  //1.

  const { data } = await axios({  //2.
    url: '/.netlify/functions/workspace',
    method: 'POST',
    data: {
      id,
      method: 'GET'
    }
  })

    const { title, content, poster } = data //3.
}- event.path에서 아이디를 추출합니다.
event.path.split('/')를 하게 되면 ['', 'workspace', '동적아이디'] 가 나오게 됩니다.- filter를 통해 빈문자는 날려보냅니다. ['workspace', '동적아이디']
- reverse()를 하면 ['동적아이디', 'workspace']가 됩니다.
event.path.split('/').filter(p => p).reverse()[0]가 곧 id가 되게 됩니다.
- axios요청을 합니다
- id로 들어가는 값은 params[1]가 됩니다.
- data에서 title, content, poster를 뽑아와 메타정보를 동적으로 채워넣어줍니다.
- 하위의 html을 가져온 부분의 meta정보에 해당하는 title, content, poster부분을 템플릿문법으로 채워넣어줍니다.
- 메타정보중 url의 경우
/workspaces/${id}을 추가해줍니다.