📌 Firebase Storage
⭐️ Image preview 만들기
이미지 파일만 올릴 수 있게 하기
<input type="file" accept="image/*"></input>폴더 변화 감지
event.target.files
파일 이름 읽기
fileReader API 이용.
 const [attachment, setAttachment] = useState();

 const onFileChange = (event) => {
    const {
      target: { files },
    } = event;
    const theFile = files[0];
    const reader = new FileReader();
    reader.onloadend = (finishedEvent) => {
      console.log(finishedEvent);
      const {
        currentTarget: { result },
      } = finishedEvent;
      setAttachment(result);
    };
    reader.readAsDataURL(theFile);
  };
  const onClearAttachment = () => setAttachment(null);

return(
<div>
     <input type="file" accept="image/*" onChange={onFileChange}></input>
     <img
  	    src={attachment}
		alt="preview"
		width="50px"
		height="50px"
      ></img>
	 <button onClick={onClearAttachment}>Clear</button>
</div>
)
⭐️ Image uploading
Reference
: 구글 클라우드 스토리지 오브젝트에 대한 참조를 나타냄.(= bucket)
uploadString
: string(데이터 url)을 이용해 데이터 업로드
원리
ref()로 파일 경로 참조를 만들고, uploadString을 이용해 참조 경로로 파일을 업로드한다.
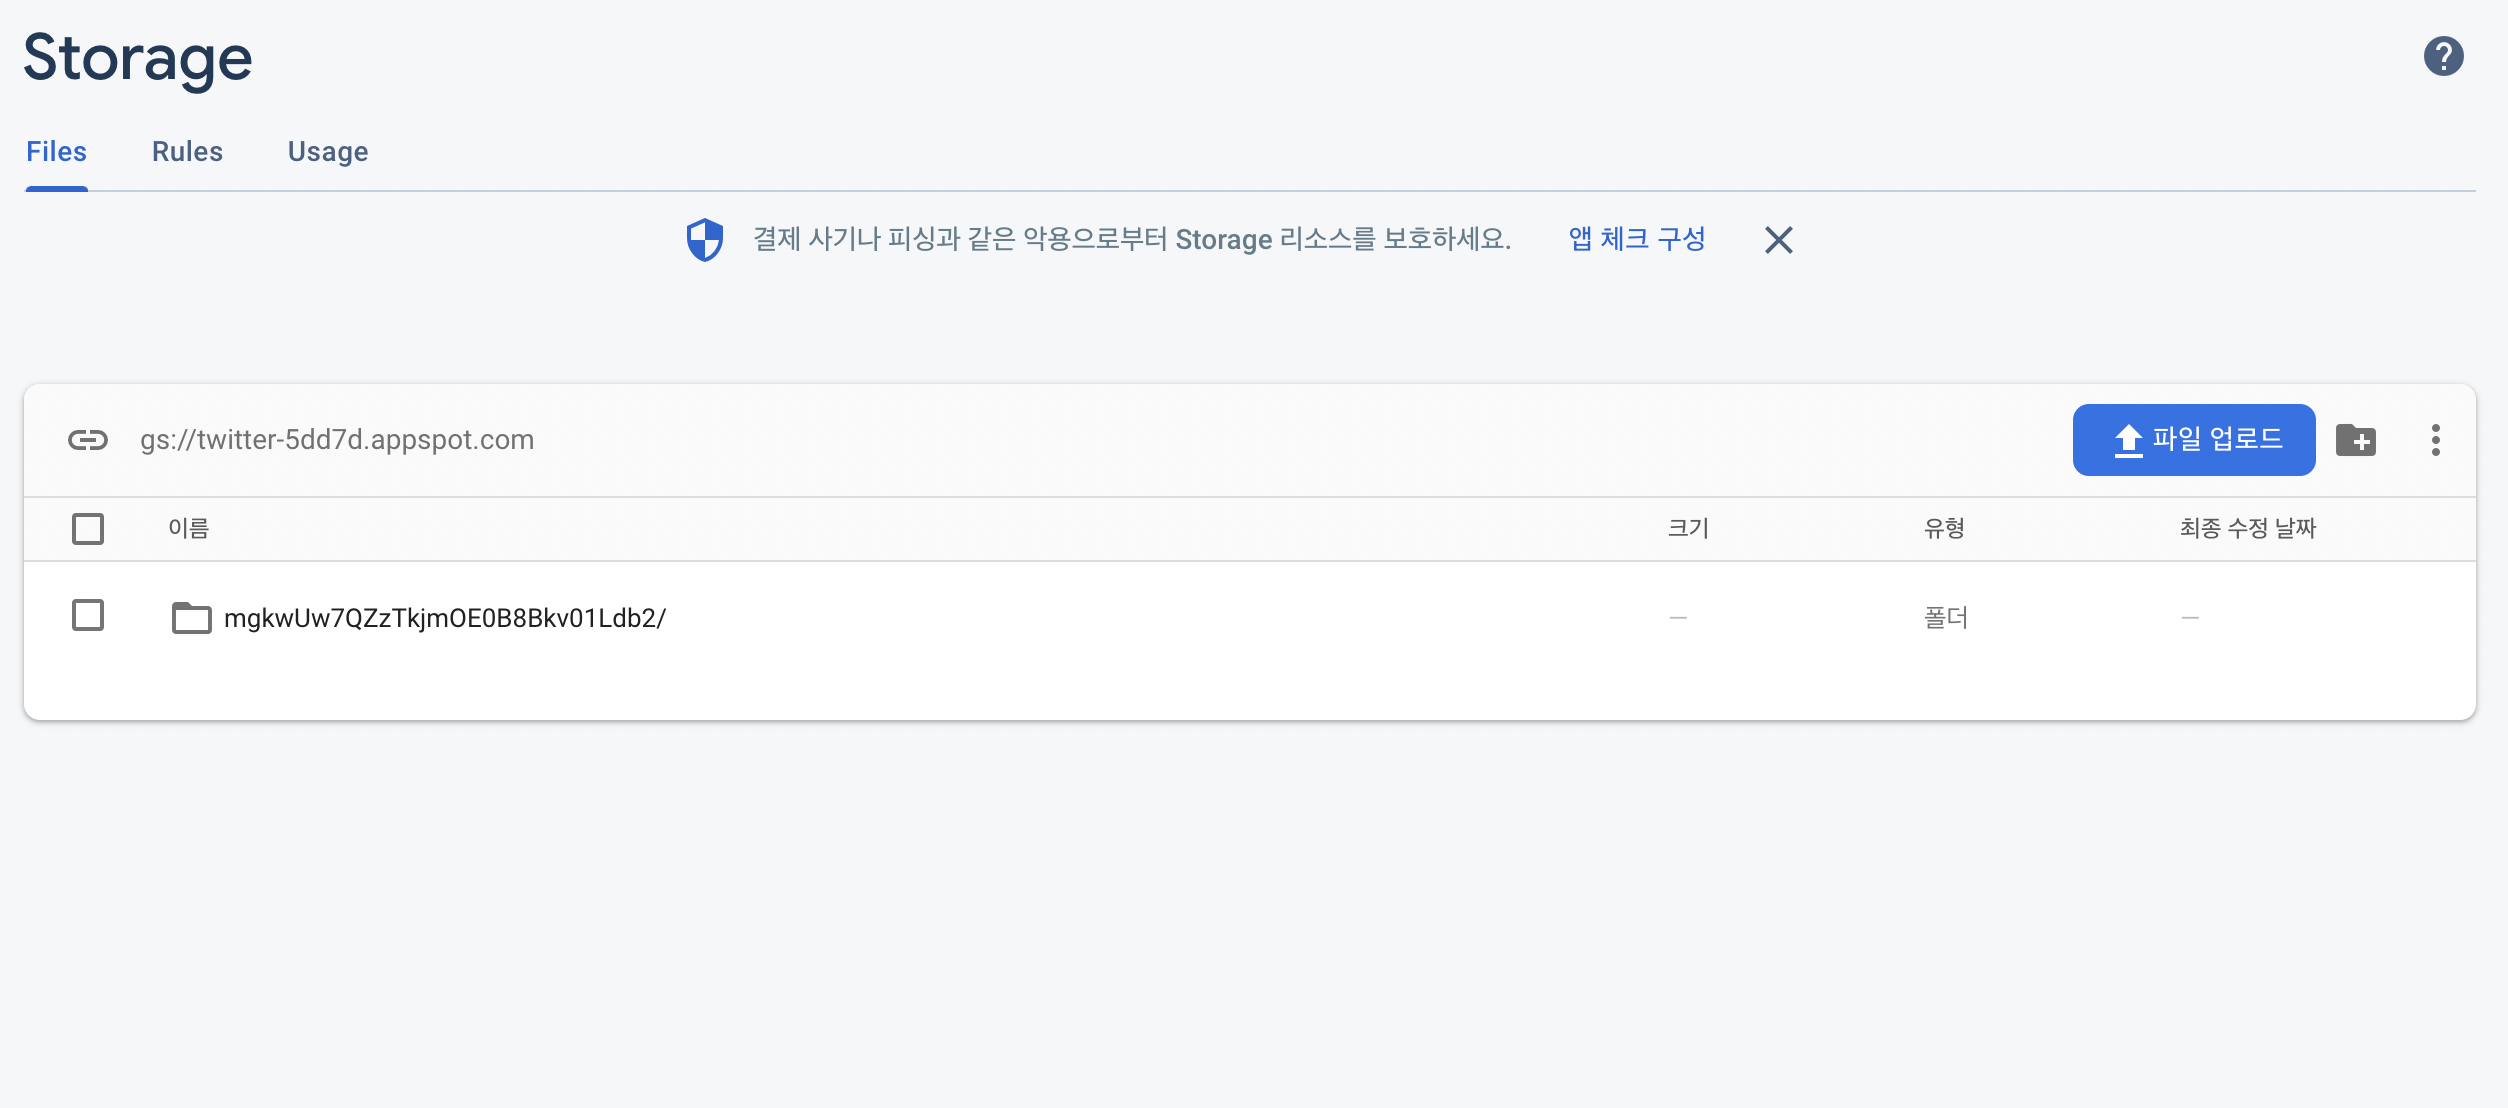
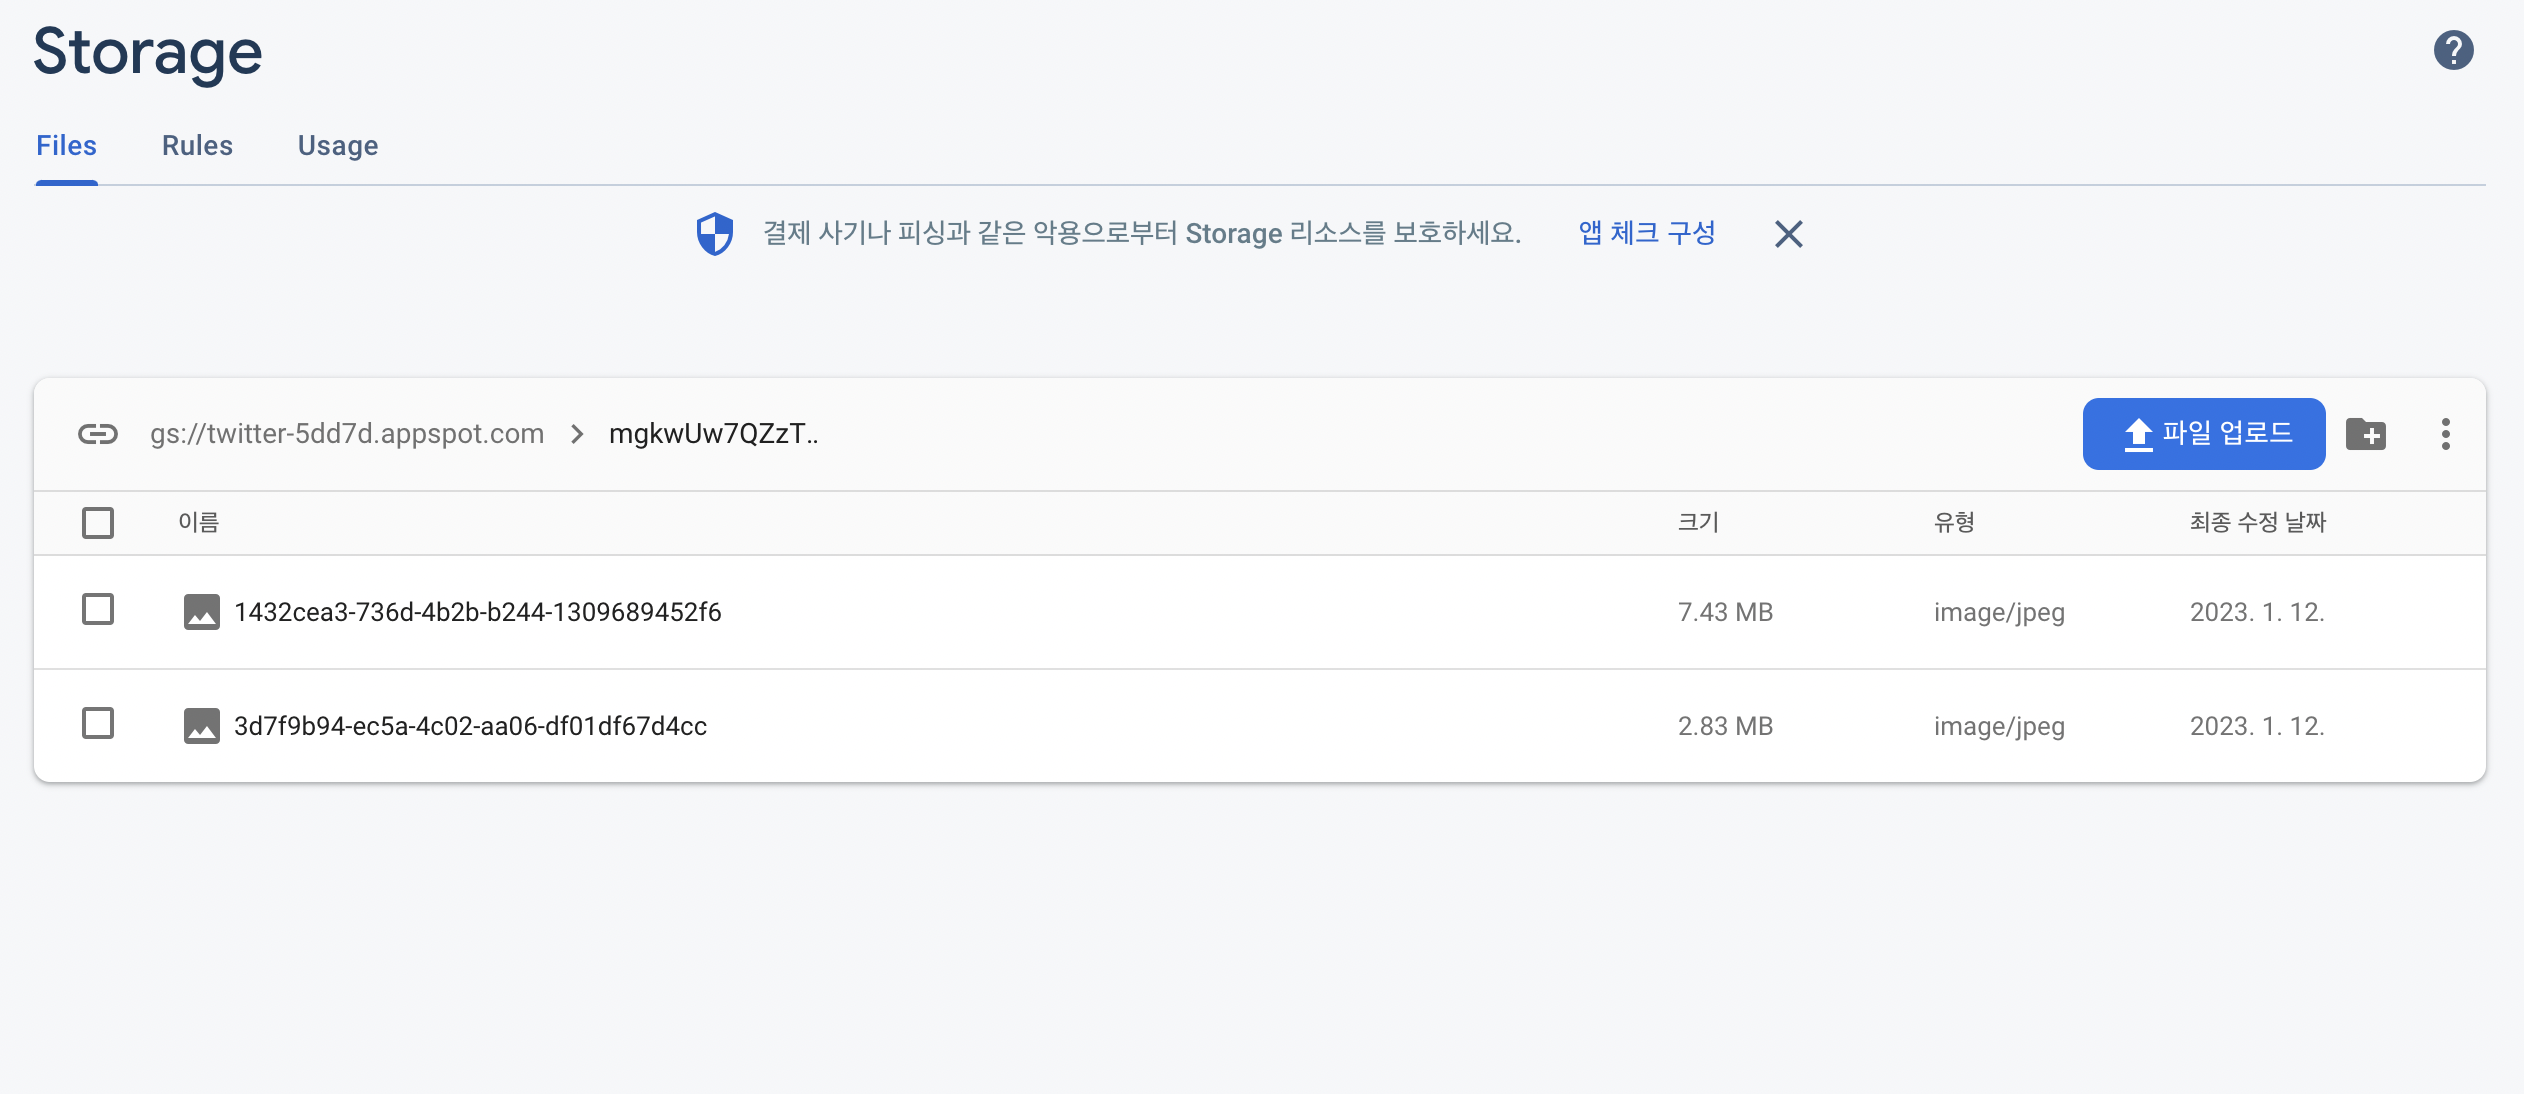
이미지에 랜덤 이름 부여하기
-> npm uuid 활용
npm install uuidfbase.js
import { getStorage } from "firebase/storage";
export const storageService = getStorage();
Home.js
import { v4 as uuidv4 } from "uuid";
import { ref, uploadString } from "@firebase/storage";
import { dbService, storageService } from "fbase";

const fileRef = ref(storageService, `${userObj.uid}/${uuidv4()}`);
const response = await uploadString(fileRef, attachment, "data_url");
console.log(response);- 이미지를 선택하고 tweet 버튼을 누르면 폴더명이 user id로 된 폴더에 랜덤 이름(uuid)을 가진 이미지 파일이 업로드 된다.
화면에 업로드한 이미지 보여주기
getDownloadURL
storage 참조 경로에 있는 파일의 URL을 getDownloadURL을 통해 다운로드해서 attachmentURL이라는 변수에 저장한다.
img 태그의 src에 attachmentURL을 넣어 화면에 업로드된 이미지를 보여준다.
이미지 삭제하기
ref, deleteObject
ref를 이용해서 attachmentURL을 전달해 firebase에서 object에 대한 참조를 얻고, deleteObject를 이용해 이를 삭제한다.
deleteObject(ref(storageService, tweetObj.attachmentUrl));참고) 자주 보이는 구문
a가 있을 때만 b를 보여주도록 : {a && b}
사용 예시 : 사용자 정보중 a가 있을 때만 b 요소를 보여준다.

모든게 새롭고 재밌는 프론트엔드 새싹